
10 Tips On Landing Your First Assistant Job
Breaking into the makeup industry can feel like trying to get into an exclusive club, especially when you're just starting out. But here's the truth: getting your first assistant job isn’t just about asking someone to “take you on.” It’s about showing them why you’re an asset and how you’ll make their day easier, smoother, and more efficient.
As a professional makeup artist based in NYC, I've seen firsthand what makes someone stand out, and what doesn’t. If you’re serious about getting your foot in the door, here are 10 practical tips to help you land that first assistant job and make the most of it.
1. Don’t Just Ask, Offer Value
Instead of sending a DM that says, “Can I assist you?”, try
“Hello! My name is Kate, and I’ve been doing makeup for 5 years in NYC. I truly admire your work and would love to support you if any opportunities arise. I’m organized, punctual, and can assist in any way, whether it’s kit setup, sanitation, or keeping things on schedule.”
Make it easy for them to say yes. Additionally, check to see if the artist you want to assist is represented by an agency. If they are, it’s a good idea to email their agent directly so they can review your details and potentially pass them along. Most of the time, you can find the agent’s contact information directly in the artist’s Instagram bio or on the agency’s website.
2. Know the Pace of the Industry
Artists don’t have time to teach you the basics on set. you need to already understand set etiquette, hygiene protocols, and the importance of time sensitivity. Be a sponge and absorb as much information as you can at home through online resources or by gaining experience in smaller environments first. This preparation will make all the difference when you finally get the call. Every key artist has a different personality on set: some will clearly communicate what they need, some won’t say a word, and some may make you feel like you’re doing everything wrong. But every one of those experiences will become a valuable lesson when you look back.
3. Be the Artist’s Second Brain
Learn to anticipate needs by staying one step ahead. Clean brushes while they finish with a client, keep products wiped down and organized, and hand over the next product without needing to be asked. By being observant and proactive, you can make yourself indispensable and ensure everything runs smoothly.
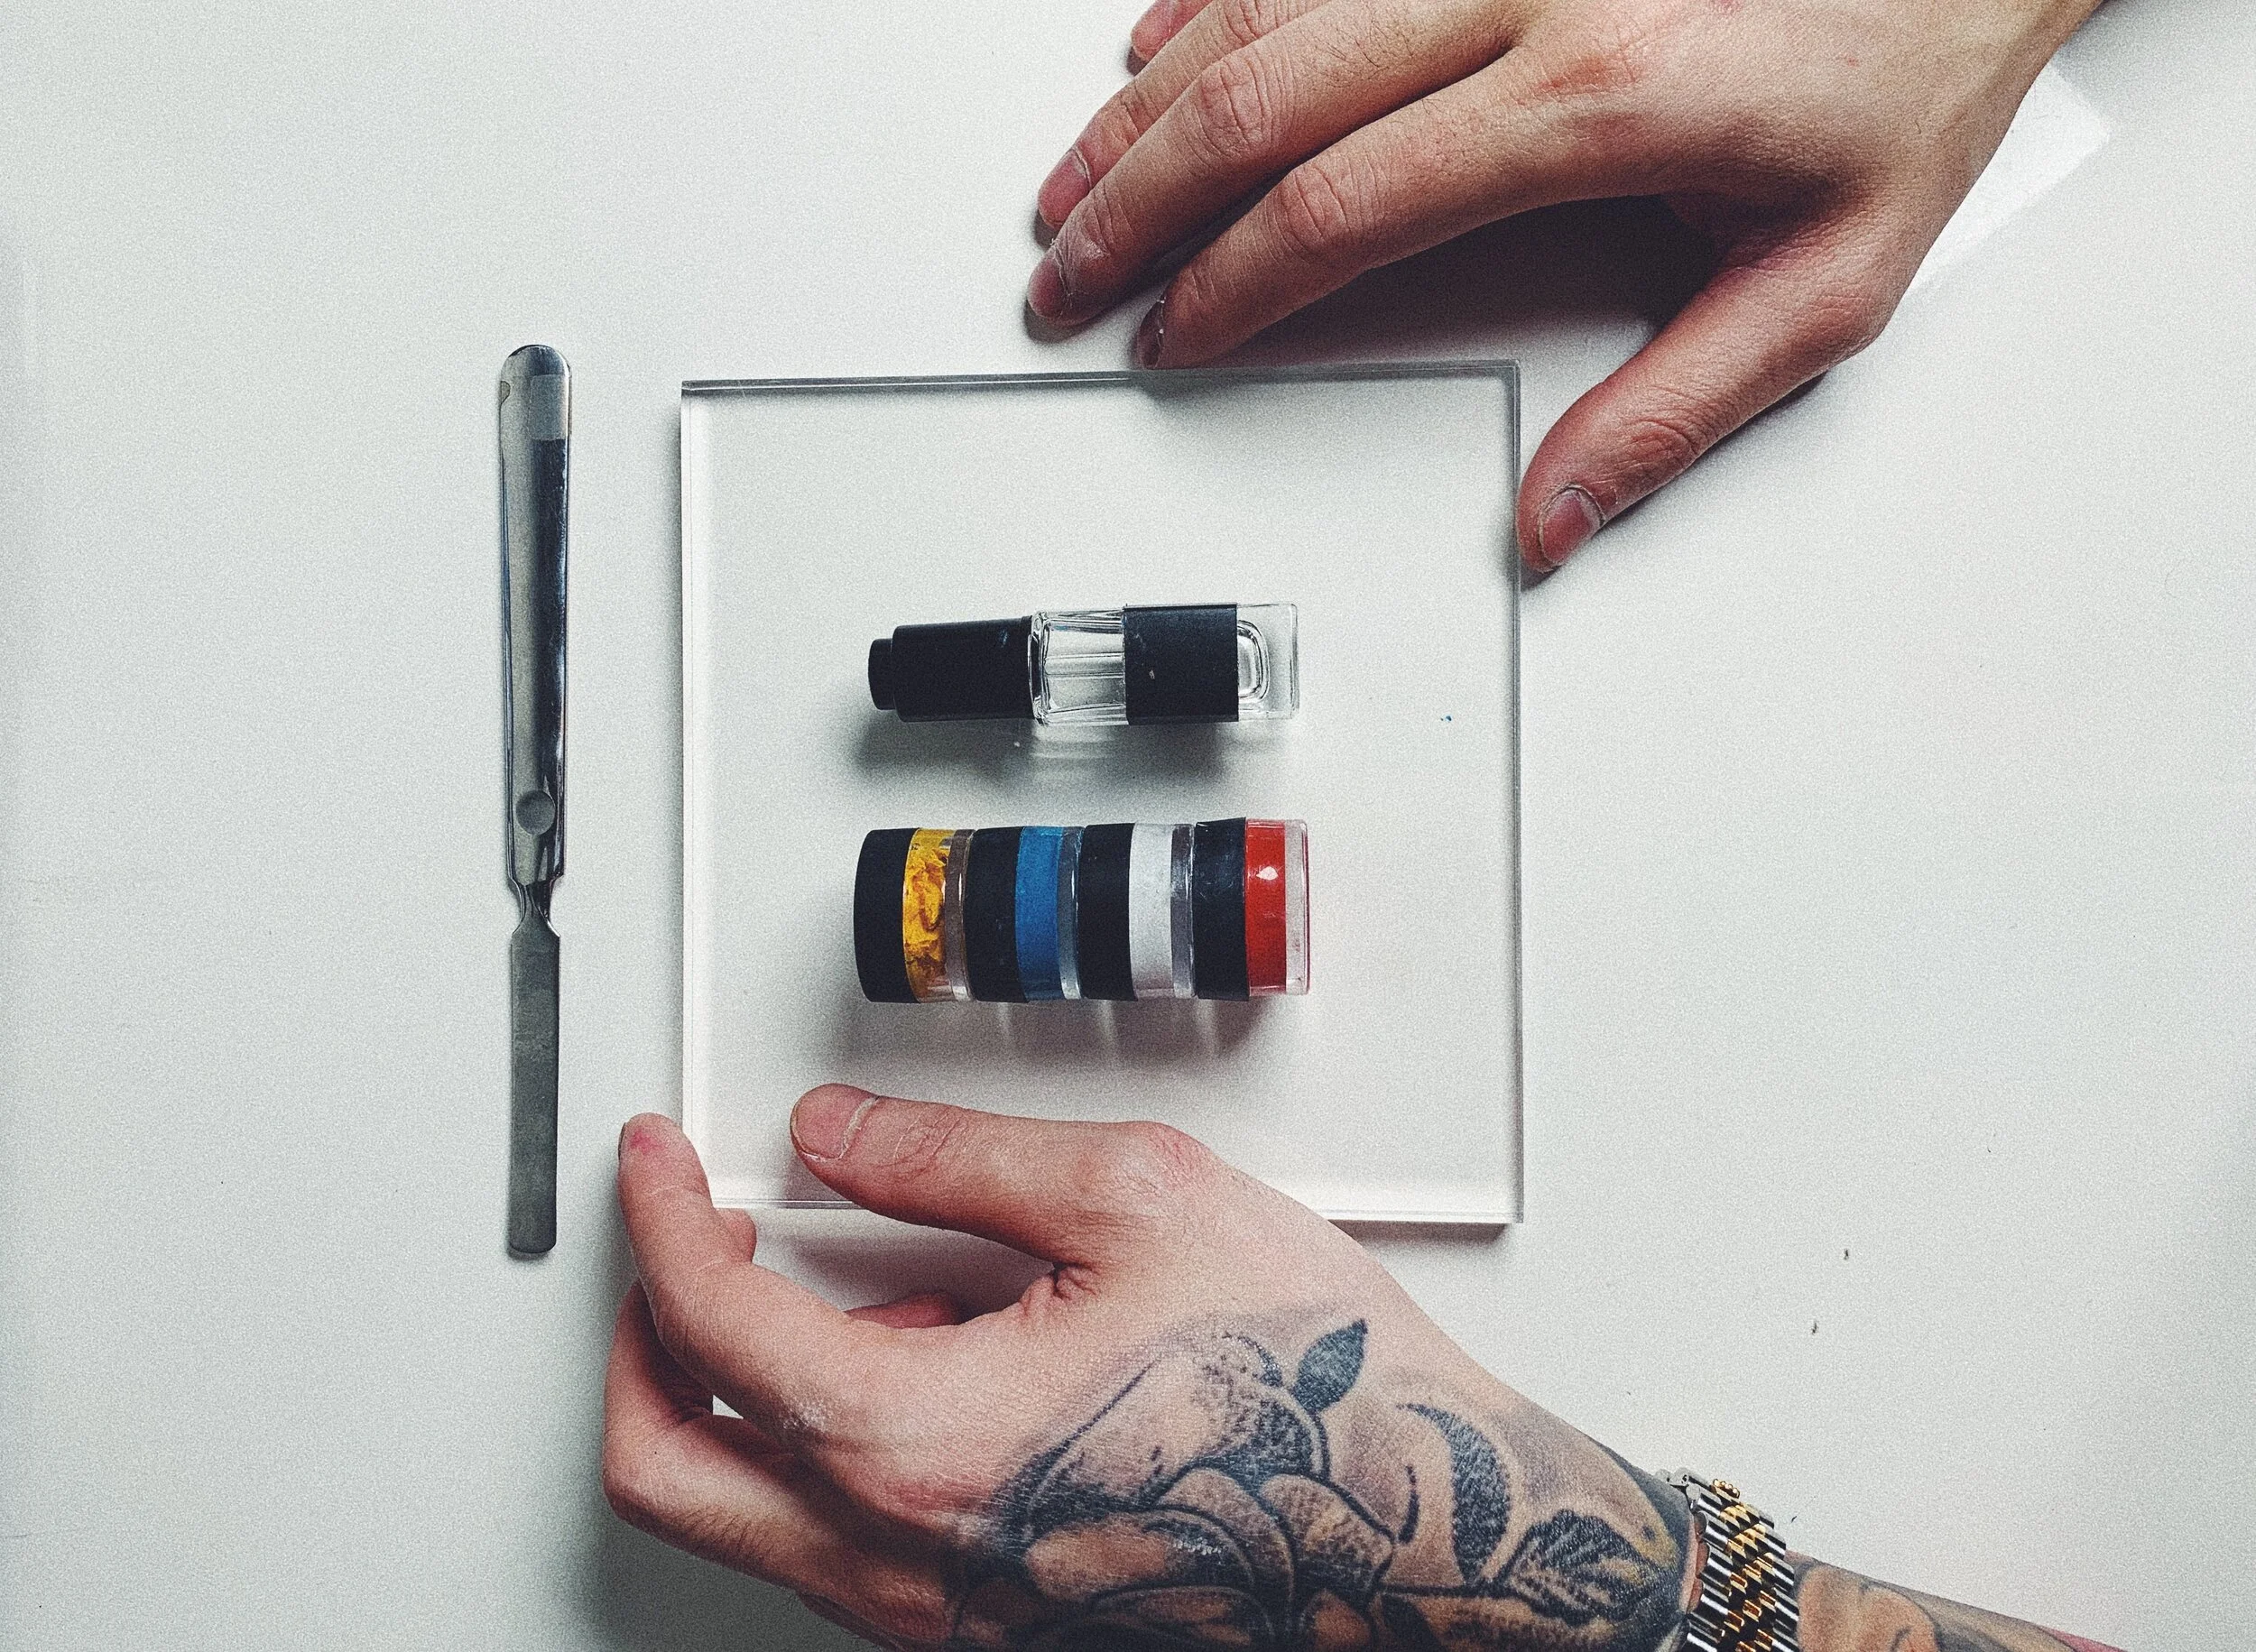
4. Keep Your Own Kit Minimal but Functional
As a beginner, you may not be doing much makeup as an assistant, but it's crucial to bring a kit that is organized, clean, and condensed even if you never get to set it up. Know your kit inside and out, so if the artist ever asks for a product, you can hand it over quickly rather than scrambling to find it. These small details can make a big difference and SEPARATE you from others.
5. Be Humble, But Professional
When you walk in that door as an assistant, it doesn’t matter what you’ve done in the past or who you worked with. Understand that assisting isn’t about showing off, it’s about supporting. Don’t correct the lead artist or offer unsolicited suggestions if they didn’t ask. Your job is to help bring their vision to life, not override it.
6. Cleanliness is Non-Negotiable
One of the fastest ways to not be asked back is by being messy or unsanitary. Stay tidy, sanitize between every touch, and always be a walking example of good hygiene. Lead artists are trusting you to represent their brand as well. You never know who is watching on set.
7. Network Offline, Not Just Online
Artists you want to assist are probably flooded with DMs on Instagram that all sound similar to yours, so take it offline. Attend makeup trade shows, beauty schools, and in-person networking events, especially if you are in major cities like NYC & LA. Meeting artists face-to-face helps build real relationships, and those connections will always open more doors than cold messages ever could.
8. Follow Up, But Don’t Pester
If an artist says, "I'll keep you in mind," it's a good idea to follow up respectfully every couple of months. Keep your tone light and professional. Most of the time, they already have a list of assistants they regularly work with, but when those people aren’t available, that’s your moment to come to mind.
example: "Hi Jason, just checking in! I'm still very interested in assisting and wanted to share my updated availability. Hope all is well!"
9. Stay Current with Trends & Techniques
We’re living in an era where education and trends are accessible for free across various platforms. If you truly love makeup and want to make it your career, it’s essential to stay updated on what’s trending in fashion, editorial, bridal, and celebrity makeup, especially in places like NYC. If an artist specializes in clean beauty or bold runway looks, take the time to align your knowledge with their style. This demonstrates initiative and a genuine commitment to your craft.
10. Be Early, Stay Late, Ask Questions (at the Right Time)
Arrive 15 minutes early and stay to help clean up. Ask questions, but only during breaks or downtime. Being curious is important, but timing is key, respect the artist's mental space when they’re focused. Yes, you’re booked until 5pm, and yes, you have the right to leave, but it’s your choice to stay because the job isn’t done. You stay because you truly want to, even if that extra 30 minutes may not be paid. This small gesture means alot.
Bonus Tip: Align Your Social Media with Your Career Goals
In today’s industry, especially in NYC, your Instagram (or any social media) is often your first impression. Make sure your feed reflects the kind of work you want to do. If you’re aiming to assist high-end editorial artists, showcase clean, professional shots of your best makeup work, organized kit shots, and behind-the-scenes glimpses that highlight your professionalism. Avoid posting content that doesn’t align with your makeup career goals, as artists looking to hire you will check your profile before reaching out.
Final Thoughts
Landing your first assistant job is a mix of hustle, humility, and being genuinely helpful. NYC is a competitive market, but it’s also full of opportunity if you position yourself right. Lead artists don’t just want help, they want the right kind of help. Instead of just asking, “Can I assist?”, shift your mindset to, “How can I make your workday easier?” That simple shift in approach is what will truly set you apart. Please be genuine and don’t just copy and paste the same message to 10 different artists. Take the time to personalize your outreach, and make it clear why you’re truly interested in working with them. Authenticity goes a long way.
SUBMIT YOUR TOPIC SUGGESTION TO HELLO@AKCCREATIVESTUDIO.COM

How Being a Makeup Artist Changed the Way I See People
I started my makeup career thinking it was about product knowledge, technique, and aesthetics. I thought it was about making people look better, more polished and creating the coolest look. But over time, this work did something deeper. It rewired the way I see people. Not just their faces, but their humanity, their insecurities, their strength, and their stories. Makeup is about transformation, but not always in the way I expected.
1. I See Faces as Histories, Not Just Canvases
In the beginning, I looked at faces like they were blank slates. A shape to balance. A canvas to do makeup on. But now, I see a person’s life before I even reach for a brush.
A scar on the chin might be from a childhood accident they’re still self-conscious about.
Deep smile lines? A sign someone has lived, laughed, and probably cried a lot too.
Puffy under-eyes might be the result of a newborn at home, or crying all night from a breakup.
Doing someone’s makeup isn’t just about enhancing their features. It’s about understanding their story.
2. Everyone Has Insecurities
You’d be surprised how many beautiful people have sat in my chair and picked themselves apart. Models, celebrities, influencers, people you’d think had it all. They’d say things like,
“Can you contour my nose? I hate it.”
“I feel so ugly without lashes.”
“Do I look fat on camera?”
I quickly learned that beauty isn’t immunity. You can be admired by the world and still doubt yourself in the mirror. Now, when I meet someone who seems intimidating or “perfect,” I remind myself: beneath the surface, everyone sees themselves differently.
3. I've Learned to Spot Beauty That Can't Be Bought
After working on hundreds of faces has trained my eye differently. Now I notice,
The way someone lights up when they talk about something they love.
The warmth in someone’s voice when they’re kind.
The quiet confidence in how someone carries themselves, even when they aren’t “done up.”
These things don’t photograph well. You can’t bottle them or fake them. But they are so much more magnetic than perfect eyeliner and the perfect smokey eyes.
4. I've Become Less Critical of People
Makeup artists get to see the real version of someone. We’re there before the makeup & hair. We see skin texture, under-eye darkness, acne, facial hair, scars. We see what’s underneath the filter. But seeing so much “realness” up close actually made me less critical, because you realize how normal all these things are. The “flaws” people are trying to hide. We all have them. And 99% of the time, no one notices them the way we do.
5. I’ve Learned to See the Person, Not Just the Face
It might sound strange, but one of the biggest shifts for me was learning to look beyond the makeup and truly see the person sitting in front of me. Doing makeup means being in someone’s personal space, physically and emotionally. It’s one of the few jobs where you get to touch someone’s face while hearing their story.
A client might cry as she talks about missing her late parent.
A model might confess that she’s been struggling with body image.
A CEO might admit that she’s terrified of public speaking.
And sometimes, they just sit in silence, grateful to be there getting there makeup done. Once you’ve had that kind of intimacy with enough people, you don’t unsee it. It shifts how you move in the world.
Final Thoughts
Being a makeup artist taught me a lot, how to choose the right products, create the best winged liner and perfect red lips, seeing the smallest imperfections, and stay calm under pressure. But more than anything, it changed how I see people. I notice more now. I listen more, and I appreciate people in a whole new way. The most powerful transformations aren’t just on the surface, but in the person as a whole.
submit your topic suggestion to hello@akccreativestudio.com

10 Harsh Truths About Being a Makeup Artist You Need to Know
Becoming a makeup artist seems glamorous, working with celebrities, creating stunning looks, and getting paid to do what you love. But before you dive in, let’s be real: this career is not all luxury and fun. It’s hard work, unpredictable, and comes with challenges most people don’t talk about. If you’re considering this path, here are 10 harsh realities you should know:
1. Unstable Income & No Guaranteed Paycheck
Unlike a 9-to-5 job, makeup artistry is mostly freelance, which means no steady paycheck. Some months you’ll be fully booked, and others will be painfully slow. You must be smart with money, save during peak seasons, and strategize ways to have multiple income streams.
2. Long, Physically Demanding Hours
Forget the idea of a short workday. Wedding gigs start at 4 AM, fashion shows run late into the night, and film sets require 12+ hour days. You’ll spend hours standing, carrying heavy kits, resulting in back and wrist pain in the long run.
3. Clients Can Be Extremely Difficult
You will encounter picky clients, impatient photographers, last-minute cancellations, and clients who refuse to pay what you’re worth. Some will try to negotiate your rates or expect miracles without understanding the effort involved. On top of that, payments can take anywhere from 30 to 90 days, especially when working with agencies or corporate clients, making cash flow unpredictable.
4. You Have to Be Your Own Business Manager
Being a great makeup artist isn’t enough, you also need to be a marketer, content creator, accountant, social media manager, and booking agent. If you don’t manage your brand well, it’s easy to get lost in this gigantic market.
5. Expensive Kit & Constant Upgrades
High-quality makeup products and kit essentials aren’t cheap. On top of that, trends change fast, so you’ll need to constantly invest in new products, brushes, and tools. Plus, hygiene is non-negotiable; disposables, brush cleaners, and sanitation supplies add up quickly. If you’re not budgeting for kit maintenance, your profits can disappear fast.
6. No Benefits (Unless You Create Them)
As a freelancer, you won’t get health insurance, paid sick days, or retirement benefits unless you plan for them yourself. If you’re sick or injured, you don’t get paid. This makes financial planning essential.
7. Extreme Competition & Saturation
The beauty industry is oversaturated with makeup artists. Social media makes it look easy to succeed, but in reality, standing out takes years of networking, persistence, and constant skill improvement. Always remember social media is curated and not always the reality. Sometimes, it’s important to look away and focus on your craft, your clients, and your personal growth rather than getting caught up in the comparison trap. True success comes from real-world connections and honing your artistry, not just chasing likes and follows.
8. Inconsistent Work-Life Balance
Forget about having every weekend off. Most makeup gigs happen on weekends, holidays, and special events. You’ll miss family gatherings, vacations, and personal time to accommodate clients.
9. The Industry Can Be Superficial & Politically Driven
The beauty and fashion world isn’t always fair. Nepotism, favoritism, and social media following can sometimes matter more than actual talent. Building real connections and proving your worth takes time. The most important thing is surrounding yourself with the right people and growing together, you never know who will become the next global brand owner or creative director. Treat everyone with respect, but be selective with your energy because not everyone deserves it. The industry has its fair share of dishonesty, so stay sharp, trust your instincts, and protect your time, talent, and reputation.
10. Burnout Is Real
Constant hustle, long hours, and demanding clients can lead to burnout. Many artists struggle with mental exhaustion and question if they’re in the right career. You have to set boundaries and know when to take a break.
Final Thoughts: Is It Worth It?
Despite these challenges, makeup artistry is still an incredibly fulfilling career if you’re passionate, disciplined, and ready to hustle. If you love making people feel beautiful and can handle the ups and downs, it’s worth the ride. But go in with open eyes, this career is not for the faint of heart.
Let me know in the comments, did you know about these 10 truths when you first started out? What’s been the biggest surprise or challenge in your makeup artist journey?
submit your topic suggestion to hello@akccreativestudio.com

What's In My Freelance Makeup Kit
This is my entire makeup kit journey. I hope these video give you answers and inspirations to help you with your kit condensing journey. Take your time, setting up your kit is not a race, there is no deadline & it's a never ending journey. As you develop as an artist, your kit will evolve with you. Do it at your own pace and do it correctly. If you find this video helpful, please give it a share.
MAKEUP KIT TOUR 2025
MAKEUP KIT TOUR 2023
MAKEUP KIT TOUR 2022
MAKEUP KIT TOUR 2021
MAKEUP KIT TOUR 2020
MAKEUP KIT TOUR 2018
MAKEUP KIT TOUR 2017
submit your topic suggestion to hello@akccreativestudio.com

Makeup Artists: Don’t Accept the Job Unless You Check 2 of These 4 Boxes
If you've been working as a makeup artist for 3+ years, you’ve probably learned that not every job or collaboration is a good fit. By now, you’ve built up some experience and skills, so it’s important to be strategic about the inquiries you take. While it can be tempting to say "yes" to every opportunity, not all of them will help you grow or advance your career. To avoid wasting time and energy, it's essential to evaluate each job based on four key factors: Connections, Portfolio, Payment and Enjoyment. Before accepting any gig, make sure it checks off at least two of these boxes to ensure it's worth your time.
1. Connections: Building Your Network
Connections are one of the most valuable assets you can have as a makeup artist. Whether you’re doing a celebrity’s makeup or working on a local photoshoot, the people you meet along the way can open doors to new opportunities and collaborations. Building relationships with photographers, planners, models, influencers, and other industry professionals can lead to future bookings, referrals, and exposure. These connections not only enhance your visibility but also help you stay updated on industry trends and insider knowledge. Over time, the people you work with will become part of your professional network. You never know where the person next to you will be a couple of years from the moment you meet them.
Takeaway: If the job gives you the opportunity to connect with cool people that aligns with your market, it’s worth considering, even if the other factors (portfolio and payment) aren’t perfect.
2. Portfolio: Showcasing Your Talent
Your portfolio is what represents you. It’s what potential clients and employers will look at when deciding whether they want to work with you. Whether it’s Fashion, bridal makeup, editorial, or theatrical transformations, a strong portfolio demonstrates your skills. Building a strong portfolio is essential. It’s not just about the number of photos, but the quality and direction it showcases. If a job offers you the chance to work on something unique that either elevates or aligns with your niche in the industry, that’s a significant plus.
Takeaway: If a job helps you add something valuable to your portfolio, even if it’s not the highest-paying gig, it can pay off in the long run.
3. Payment: Valuing Your Work
At the end of the day, your time and talent are worth something. Payment is a straightforward yet important factor when deciding whether to accept a job. While passion and experience are important, it’s also crucial to ensure you’re being compensated fairly for your skill set. Aspiring makeup artists may feel tempted to work for little to no pay in exchange for exposure, but the reality is that undervaluing your work early on can create a pattern that's difficult to break. Ideally, a job should offer compensation that reflects the time, effort, and expertise required, based on your skill level and the area that you're in.
Takeaway: If the job offers good pay, that’s a definite plus. But if payment is low or non-existent, consider whether the opportunity provides a good trade-off in terms of connections or portfolio growth.
4. Enjoyment: Loving What You Do
Enjoyment is often overlooked but is just as crucial as the other factors. A job that excites you or aligns with your passions can provide much more than just a paycheck—it can spark your creativity and inspire you to keep growing. Working on projects you genuinely enjoy can keep you motivated and energized. If a job brings joy and fulfills your creative drive, it can be an invaluable experience, even if the payment isn’t great or the connections are limited.
Takeaway: If the job excites you and brings joy, it’s worth considering, even if the pay and connections aren’t ideal. Passion and enjoyment can help sustain you in the long run.
What If You’re Just Starting Out?
When you’re just starting out, checking off two boxes might be challenging. In these cases, focusing on one box, whether it’s building your portfolio with interesting work, making valuable connections, or taking on jobs that you genuinely enjoy—could be a better approach. As you gain experience and build your reputation, you’ll be in a stronger position to prioritize payment while still growing your network, portfolio, and passion for the craft.
Takeaway: As a newbie, focus on either portfolio, connections or enjoyment; whichever will help you most at that stage of your career. Don’t feel pressured to accept poorly paid jobs that don’t help you grow in one of these areas.
Conclusion:
In the world of makeup artistry, opportunities are abundant, but not all of them are the right fit for your growth. Before accepting a job, ask yourself: Does this job help me build connections? Does it add to my portfolio? Is the payment fair for my time and skills? Does it excite me and bring me joy? Ideally, you should aim to check off two of these boxes, but as a beginner, prioritizing one—whether it’s gaining experience, building relationships, enjoying the work, or earning decent pay—will set you up for a stronger future. Remember, every gig is an opportunity to grow. Choose wisely, and make sure the jobs you take help you move forward, not backward. Stay focused on your goals, and you’ll build a successful makeup artistry career in no time.
submit your topic suggestion to hello@akccreativestudio.com

A Beginner's Guide to Setting Your Rates as a Makeup Artist
As a makeup artist, determining your rates is not just about picking a number or what others are charging; it's a strategic process that reflects your skill, experience, and the value you bring to your clients. Here are a few essential components of setting your rates, taking into account your experience, social media presence, location, field of specialization, as well as the critical considerations of travel, products, time and labor.
Your Locations
Geographic location plays a pivotal role in determining your rates. Please refrain from solely relying on social media and asking people from all over the world how much they charge, thinking you can just adopt those rates. Firstly, it's crucial to conduct research on the average rates in your specific area, taking into account the local cost of living. If you are located in NYC or California, naturally, your rates will be higher than in smaller towns. However, if you are an established artist, your approach might differ; you can set a standard rate applicable to any location, leaving it to the client to decide if it aligns with their budget.
Your Experiences:
In the initial two years of my career as a Makeup Artist, I undertook numerous unpaid jobs to gain experience, initially thinking $50-$80 was a substantial amount until the reality hit that it posed challenges in covering essential expenses like rent, food, and basic needs. Your level of expertise plays a pivotal role in determining your rates. Reflect on the years dedicated to improving your craft, the training you've invested in, and the skills acquired through continuous learning. For those just starting, it's acceptable to charge lower rates, ensuring it covers your supplies. As you evolve as an artist, your rates should gradually adjust. Established artists with experience can command higher rates, mirroring the true value of their expertise.
Your Social Presences:
In 2024, simply doing makeup alone is no longer sufficient. Whether you agree or disagree, the reality of the current time emphasizes the importance of growing your social media presence. In this age of digital influence, your standing on social media can profoundly affect your market value. A larger following, increased engagement, and a robust online presence can make a substantial impact on your professional reach. This element can empower you to set higher rates even if you operate in a smaller town, showcasing the influence of a strong online presence in shaping your market value.
Your Makeup Niche
Within the makeup industry, various fields, including fashion, bridal, union, theater, salon, and more, they all have different elements to determine each rates. It’s crucial to research and educate yourself across these diverse fields to establish a foundational understanding of their differences. By deciding the direction in which you want to grow, you can effectively determine the rates you should charge, considering the unique demands of each field and what elements should be accounted for within your rates. This strategic approach ensures that your pricing aligns with the specific requirements of your chosen makeup path.
Your Expenses
When establishing your rates as a makeup artist, it's vital to recognize that you're not solely charging for the makeup service itself. Consider the time invested in preparation, travel, and the costs associated with quality products, and factor these into your rates. Just because you can complete a full makeup application in 45 minutes, charging $50-$80 doesn't equate to keeping 100% of that fee. Numerous factors need to be considered. Your rates should reflect not only your artistic skill but also the time and effort invested in delivering exceptional results. It's crucial to dedicate time to educate yourself and devise a realistic pricing strategy that not only supports your career but aligns with your chosen lifestyle.
A Formula for intermediate Artists
I've developed a simple formula that has provided me with guidance when determining rates. For example, if I charge $100 for an on-location makeup service, and the entire process – including preparation, travel, setup, service, and cleanup – takes 3 hours, the calculated hourly rate is $33. This makes it easier to adjust the hourly rate as I grow as an artist, using the formula as a guide (bearing in mind that it doesn't include the cost of products used on the job, making the actual hourly rate even lower).
To illustrate, if I charge $33/hr, someone wanting to book me for 4 hours would result in a half-day rate of $130, and 10 hours would lead to a full-day rate of $330. This prompts me to evaluate if the hourly rate works for me and make adjustments accordingly.
Extending this formula to rates like $100/hr, $120/hr, and $150/hr allows for flexibility. While this is not a definitive system, it serves as a general guide to jumpstart your thinking if you're unsure where to begin. People may have differing opinions on this, but this approach has proven effective for me, and I'm sharing it with you. Ultimately, clients will decide whether to book you based on your rates, experience, and social presence.
In conclusion, setting your rates is a multi-faceted process that involves careful consideration of your experience, online presence, location, specialization, travel, product costs, and the value of your time and labor. By evaluating each aspect, you can confidently establish rates that not only reflect your worth but also ensure a sustainable and successful makeup artistry career.
submit your topic suggestion to hello@akccreativestudio.com

10 Essential Steps To Improve your Career as a Makeup Artist in 2025
As we enter 2024, being a successful makeup artist is about more than just being creative. This article breaks down 10 important steps to improve your career in makeup. From learning new skills to organizing your kit and being active online, these steps are meant to help both new and experienced artists navigate the changing beauty industry.
1. Understanding basic photography, video & lighting
Having basic understanding of photography, video and lighting is indispensable for Makeup Artists. We are in a time where being an artist is just not enough; content creation and having a social presence are significant parts of this career, whether you like it or not. No matter how incredible your makeup is, if it’s not captured and presented correctly, your work will not reflect you as an artist. We are living in a time where knowledge is free and we can build an entire brand with a single mobile device in the comfort of your home. Most importantly having these basic knowledge can allow you to communicate with other creatives when you are on set and understanding why sometime images or video does not translate on the monitor versus in real life.
2. Re-evaluate your Makeup Kit
Reevaluate your makeup kit by laying out the entire contents and dedicating time to assess the tools and products you carry. Each item you choose should serve a purpose, avoiding inclusion 'just in case.' A well-curated makeup kit enables you to work faster and more efficiently, crucial in various career stages, locations, and fields. There will be times when you won't have a dedicated table or ample setup and breakdown time—having a condensed kit allows you to adapt to any situation. Building a kit is both expensive and time-consuming. My advice is to invest time in planning and researching, considering your needs and actual usage, before diving into this task to prevent frequent changes in your setup
3. Embrace Social Media: Share your Journey
Be active on social media and share your authentic self to leverage the power of personal branding. Showcase your work, behind-the-scenes moments, and your genuine self to connect with your audience on a deeper level. Trust me when I say, social media is not just a fun thing; it's part of my job. No one wants to work a 10-14 hour day on set, only to come home and deal with editing content, posting it, and receiving 12 views and 2 likes. It takes time and consistency to see results. Saying 'I don't understand it' or 'I don't like social media' can have a significant impact on your career. Remember, there was a time when people had to walk to work before cars were invented or mail a letter to communicate with others. Times have changed, and it's your choice to embrace these technologies or not.
4. Create content outside of work
Make time to create content outside of work. Beyond your paid assignments, it's essential to motivate yourself to practice, try new things, step out of your comfort zone, and continuously enhance your content while building your personal brand. As a Makeup Artist, you know that most of the time, you can't even post content from paid work until it's launched. Additionally, not all paid assignments align with your artistic style. It's crucial to curate a body of work that represents you as an artist and appeals to potential clients.
5. Find Inspiration beyond social media
If you only consume content on social media, your work will often reflect what is currently trending, making it more challenging to develop your own unique style. I believe it's important to visit museums, travel, and seek inspiration beyond the realm of makeup. I recall the first time I saw the work of Makeup Artist Terry Barber - it was a photo of burnt toast, next to which was a beautiful smokey eye inspired by the burnt toast. It might sound silly, but I still remember that today, and that was 6 years ago
6. Have a proper headshot
Have a proper headshot. Your headshot is often the first impression you make. It's important to invest in a professional headshot that reflects your style and personality, serving as a visual representation of your brand. Trust me, there will be a time and place when it will come in handy.
7. Build your portfolio around the market you want to be in
Think about the market you want to be in and build your book around it. This is something I wish someone told me when I first started. Building a book takes a long time and costs money. If you know you want to be a bridal Makeup Artist, curate your book around that before you start doing triple liners with a black lip. By following this advice, you can ensure that the end results can help you attract potential clients.
8. Use Social Media as a tool
Use social media as a tool. I know we've already spoken about this, but it's probably one of the most important things on this list. Social media is a tool—a very powerful one if you leverage it. Ninety-five percent of my paid work comes from my Instagram. Times have changed, and we need to keep up with them, or you can potentially miss out on many opportunities. I built an entire brand, Artist Kit Company, with just Instagram. I used to sleep on people's couches when I moved to NYC, and now I have a beautiful office and apartment in the heart of the city. I say this not to brag, but because I am 36 and have many friends who think social media is just a joke and look down on it. When I look at them, I see so many wasted opportunities. It's okay to feel confused, lost, and not understand something, but it's important to be open-minded, especially if you want to be a Makeup Artist in this current time.
9. Continue learning to grow
Continue to learn and educate yourself. The industry is constantly changing, and we, as artists, need to adapt to those changes. There is so much free knowledge on the market, and as individuals, we can decide if we want to continue learning. Every successful Makeup Artist I've ever met has told me the same thing: If you think you know everything, your career will stop there.
10. Write down your goals and a checklist of steps to achieve them
Transform your aspirations into reality by setting clear and realistic goals. Create a detailed checklist outlining the steps required to achieve these goals, providing a roadmap for your career progression. If you want to make $100,000/year, instead of looking at that single number, break it down to your rate per client and calculate how many clients you need in a year to hit that goal. Go even further by calculating how many clients per week can get you to that goal. Honestly, one of the best things I did was to start writing down goals with a checklist and put it in a place where I can see it every day to keep me on track.
In conclusion, the makeup industry will continue to change, and these are the 10 things that I believe can be helpful to anyone trying to navigate through the industry. I hope you find something helpful in the article because these are the things I wish someone told me when I first started out. If you feel lost and want some advice or guidance, feel free to book a Virtual Consultation
submit your topic suggestion to hello@akccreativestudio.com

10 Ways To Prevent Future Back Problems As Makeup Artists
In the world of Makeup Artists, there’s a challenge rarely talked about; the toll it takes on your body. During my first visit to a chiropractor, I learned that Makeup Artists and Hair Stylists frequently battle persistent back pain. It wasn’t until my seventh year in the field that I truly absorbed this fact, as discomfort settled into my neck, upper back & lower back. Turns out, the cervical spine, where your neck meets your shoulders, holds a lot of power. It’s the central of your spinal system where all your nerves meets. If any of the nerves are obstructed, it can cause muscle weakness, pain, numbness, tingling, vision problems, headache & migraines. I am not a medical expert, but discussions with doctors and specialists, it gave me a lot of insights. What peculiar about back pain is how it can ambush you, one day you’re fine, the next day can lead to chronic back issues. That’s why being aware of your posture and movements is absolutely key. Here are 10 tips that I learned that can help you avoid back issues as Makeup Artists & Hair Stylists.
1. CONDENSE YOUR KIT
Be mindful of the weight you carry in your makeup kit. Consider condensing your kit to reduce the strain on your back for the long run. You can still have everything you want but in a smaller size. This not only helps in preventing back issues but also enhances your workflow allowing you to work faster and more efficient. It’s an investment of your money and time, but much cheaper than seeing specialist in the future.
2. OPTIMAL SEATING
Ensure your client’s chair is at eye level to yours. This is crucial for maintaining excellent posture throughout your work day.
3. PRE AND POST WORK STRETCHES
Incorporate simple stretches before and after your workday to counteract the strain from prolonged uncomfortable positions that we put our body in to alleviate back tensions
4. LOOK UP
We spend a lot of time on our phone, laptop & other electronic devices. Instead of looking down, raise your devices to eye level. This relieves stress on your neck and shoulder muscles caused by the weight of your head.
5. COMMUNICATE WITH YOUR CLIENT
Most of us try to accommodate our client and put our body in the most awkward positions. Don’t hesitate to discuss your comfort needs with your clients. Ensure your work environment accommodates good posture. Request higher chairs for longer sessions or adapt to the situation by lowering yourself to your client’s eye level.
6. STANDING MAT & FOOTWEAR
For long period of standing, request a standing mat on bigger jobs or consider using one in your home studio. Wear well-padded, comfortable footwear to ease the strain of extended standing.
7. SLEEPING POSITIONS & PILLOWS
Adjust your sleeping position to avoid spin misalignment and breathing issues. Sleeping on your stomach is the worst position you can put your body through during 8+ hours of rest. Choose a neck supportive pillow and place another under your knees to maintain a straight spine and prevent lower back discomfrot. I know it could look silly but if I knew this beforehand, I rather look silly now than having chronic back pain and waking up up like someone beat me up the day before.
8. LIFT SMART
Learn proper lifting techniques, especially if you ave a heavy makeup kit. Elevate with your knees to protect your back during tasks like moving your kit up stairs or in and out of vehicles.
9. LIGHTING
Ensure your workspace is well-lit to prevent leaning or hunching over to see your work. Adequate lighting reduces the strain on your neck and back.
10. CORE STRENGHTENING
Research on which muscles that you often use as Makeup Artist, learn a few simple exercises that target those muscles in order to strengthen them.
In conclusion, there may be instances in this profession where fulfilling all ten points might be challenging, but strive to stay conscious of your posture. Once chronic back pain sets in, fixing it isn’t as simple. Preventing through lifestyle adjustments becomes the key. It’s far more challenging to make these chances once the issue has developed. This is a subject I wish I had been informed about when I began my journey as a Makeup Artist, so I genuinly hope you give it serious consideration, even if you currently feel perfectly fine and invincible. If you find this read valuable, please share it with your friends and colleagues.
submit your topic suggestion to hello@akccreativestudio.com

10 Tips On How To Be A Successful Makeup Assistant
After 10 years in the beauty industry, I can say assisting has played a major role in shaping me into the artist that I am today. It teaches you to adapt to various personalities and situations. Being an assistant with a new artist is like going on a first date, where you must quickly learn and observe everything about the person. Throughout my career, I made many mistakes, and I want to share my experiences with you to create a cheat sheet for aspiring Makeup Artists. Here are 10 advices on how to be a successful makeup assistant.
1. Be Early
Arriving early, not just on time, is a non-negotiable in any industry. Being late can tarnish your reputation and affect the entire day’s energy. As an assistant, setting up, and understanding the run of day before talents arrive is crucial for a successful job.
2. Be Present
What separates a good assistant from a great one is being present at all times. Always stay alert and avoid wandering around. A single moment of being there for the key artist can make a significant difference in getting a call back.
3. Wardrobe & Hygienes
As an assistant, you represent the key artist. Showing up with sandals, smelling like cigarettes, or looking tired is unacceptable. Such actions reflect on the key artist, and talents notice them. Dress professionally; a black shirt, black jeans, and comfortable shoes works well. Be aware of your hygiene and avoid overpowering odors.
4. Organized & Clean Kit
As an assistant, being prepared is key. Having an organized and clean makeup kit allows you to locate products without having to scramble through bags and pouches. Also, never arrive on set with dirty brushes.
5. Observe & Think Ahead
This skill is what separates a great assistant from the rest. Watch the key artist closely without being invasive. Anticipate their needs and be one step ahead of them. If you see the key doing eye shadows, instead of them turning back and forth to grab more products, bring the palette in front of them on their dominate side, if you see they are doing a liner and made a mistake, get a dry and a wet Qtip ready incase they need it, or before setting up their kit, take a photo of the suitcase so it can help you when it comes time to pack up. These are things that can make a huge difference. I am not saying everyone will like this. It’s important that you observe and learn about the person you are assisting, always read the room.
6. Put Down Your Phone
We are living in a time where social media plays a huge role and sometimes this can result in not getting a call back. Remember, your job is to be there to support the key. You being on your phone can make the key look bad in front of the rest of the team. When you assist on a bigger job, there will be NDA in place and by you using your phone, that can result in you and the key getting fire from the job and into legal issues . On the other hand, if the key asks you to capture content for them, then thats a different story.
7. Posting Without Credit
Never post the work without crediting the key artist or claiming it as your own, this is a big no no. Always check with the key artist first, some might be cool with you posting, while others may have specific rules and do not want you to post at all. In the end you get paid to be there to assist and that is all.
8. Avoid Gossiping
No matter how big or how small the room is, someone is always listening and observing. Never gossip on set. It is extremely unprofessional. Keep your opinions to yourself. You are there to do your job as an assistant.
9. Opinions & Product Recommendation
This happens quite often, and it’s our nature to share our opinions, techniques and product recommendation. My opinion is, it’s better not to do it unless they ask. This is a huge no no especially if an assistant does it in front of a client or talent.
10. Always Ask First
When someone other than the key artist wants you to change or start on a makeup, always ask the key first. You were brought onto the job by the key artist, so the only person that you should listen to is they artist themselves to avoid all issues.
11. Bonus Tip
Be loyal, never go behind the key artist’s back communicating with the client privately for future jobs. No money is worth ruining the relationship with the person that brought you onto the job. This is basic ethic.
Conclusion:
Remember, every experience counts. You will encounter all sorts of personalities, and it’s all part of the journey growing as an artist. I assisted some incredible and kind Makeup Artists but at the same time, I’ve seen assistants get sent home, yelled at, and physically pushed. It’s not something we want to hear or see but it’s a reality in the industry. I hope these tips can help.
submit your topic suggestion to hello@akccreativestudio.com

5 Reasons Why I Don’t Display Branding In My Makeup Kit
As a Makeup Artist, my journey in the beauty industry has been filled with both fascinating and unique experiences. I remember being on set for an Adidas campaign in NYC, as I set up my makeup kit, the production manager noticed I was wearing shoes from a different brand. To my surprise, they had a runner buy me a pair of Adidas shoes. It was a strange experience, but it made me rethink my approach to my makeup kit. Since then, I decided to remove all branding from my kit. Let me tell you my 5 reasons why I don’t display branding in my kit.
1. Versatility and Ease of Work
In the fast-paced world of makeup artistry, I work with a diverse array of cosmetic brands on various sets. With cameras constantly rolling behind the scenes, keeping brand labels concealed makes my life as an artist a whole lot easier. I can seamlessly transition between products, adapt to the specific needs of each project, and focus solely on creating stunning looks without unnecessary distractions.
2. Personalized Care for Clients
Every individual's skin is unique, and so are their preferences. Some clients may claim to be allergic to certain brands, but it's often specific ingredients that trigger sensitivities. By avoiding visible brand labels, I can concentrate on understanding the individual’s concerns and customizing makeup choices to suit their needs while being able to use proper products for the best results. This ensures a safe and tailored makeup experience for everyone.
3. Emphasizing Skill and Personality
One important thing I value is building connections based on talent and personality, rather than brand affiliations. I take pride in working with clients who appreciate my skills and unique approach to artistry. By not relying on brand endorsements, I can establish genuine connections with clients who choose me for who I am as an artist.
4. Authenticity and Product Evaluation
In an era dominated by social media, authenticity is key. I believe in staying true to myself and my craft, and that includes promoting only the products I genuinely use and believe in. By avoiding brand displays, I can freely experiment with new products on set, ensuring that I only endorse items that I truly love.
5. Honesty and Integrity
As a makeup artist, I understand the power of influence. Rather than endorsing products solely for financial gain, I prioritize honesty and transparency with my audience and clients. By concealing brands in my kit, I maintain the integrity of my recommendations and ensure that they stem from authentic experiences, fostering a sense of trust between myself and those who rely on my expertise.
In Conclusion
My decision to not display branding in my makeup kit helps me build genuine connections with my clients and audience. With this approach, it allows me to focus on what matters: creating, ensuring client satisfaction, and sharing only the best and most reliable products with my audience. As I continue to grow as an artist, I remain committed to staying true to my craft and being authentic.
Disclaimer: Just because something cost a lot and considered “luxury” it does not mean it works or good for all clients and vice versa. This is my personal opinion and my experience as an artist. you can do whatever you want, carry whatever you like, if it works for you by carrying products with all branding, then do you. Also, if you work for a cosmetic brand then it’s normal to carry that particular brand in your kit.
If you enjoyed the read and like to donate a coffee, Zelle vanktr@gmail.com & Venmo @vanktr
Lighting & Modifiers for Makeup Artists
In today's beauty industry, where social media plays a huge role in our career, it is crucial for Makeup Artists to understand how to properly capture their work. Often, we blame the camera equipment’s while overlooking the essential role of lighting. This article aims to provide Makeup Artists with some basic knowledge of the different types of lighting & modifiers. By understanding these aspects, artists can have better knowledge to capture their makeup looks, wether using a phone or camera, and deliver high quality photos and videos that truly represent their work.
Before we start, I want to highlight that I will always choose natural window light first for capturing content and doing makeup if it’s available. Why? Because it accurately shows what things really look like in real life. Another great thing is that it doesn't cost a thing, so you don't have to spend money on extra stuff. If this is not an option, here are 3 types of lights you can choose from.
18” Ring Light:
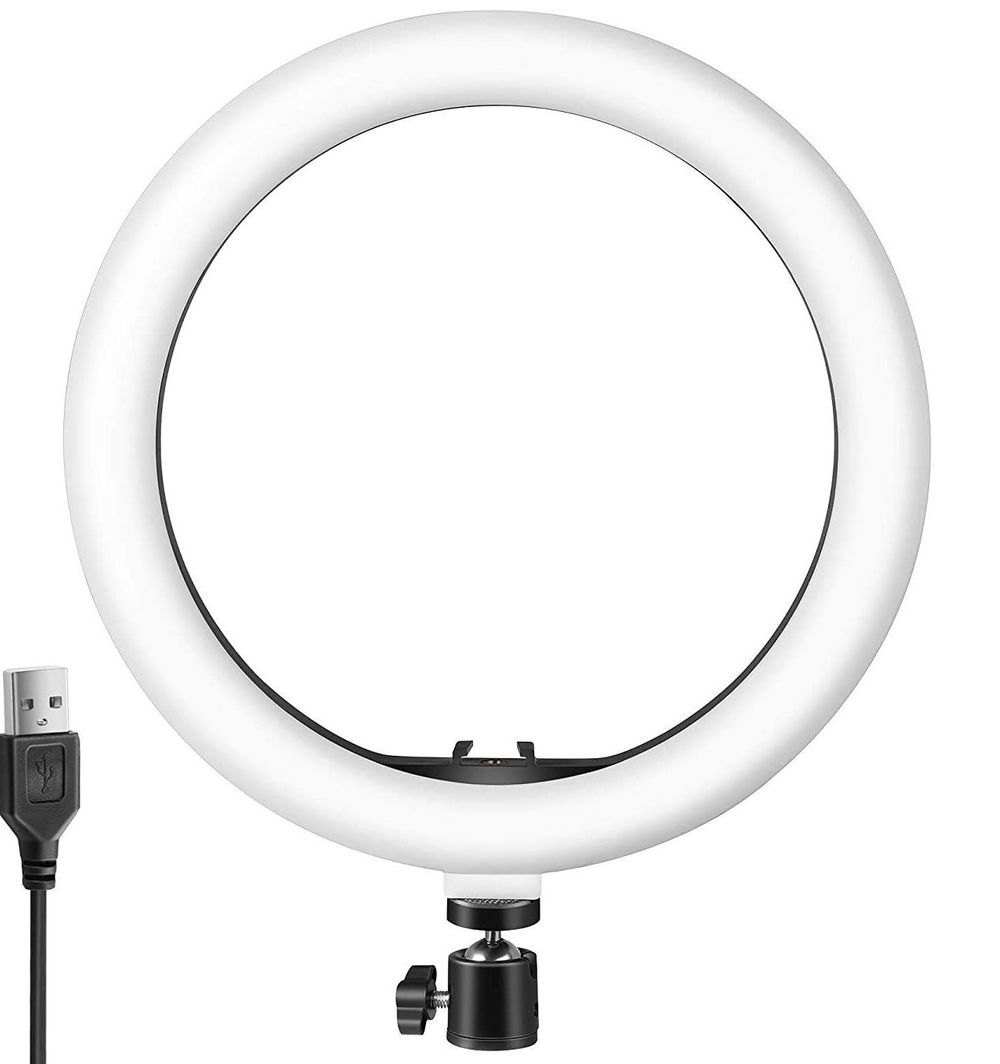
Ring light have become a popular tool used by Makeup Artists, although their intended purpose is often misunderstood. These lights are specifically designed to capture straight on headshot from the neck up, offering high contrast and a distinct circular reflection in the subject’s eyes making the overall feel less natural. One area where ring lights tend to fall short is when it comes to lighting your subject during makeup application. Due to their size & single point illumination, they can create uneven lighting, resulting in one side appearing darker than the other.
Pros:
-Affordable ($50+)
-Small and compact
-Capturing close up contents (Neck up & Macro shots)
Cons:
-Using it to illuminate your subject during application
-Unnatural circular reflection in the subject’s eyes
2. LED Panel

LED panels also gained popularity among Makeup Artists as a lighting option. They are lightweight, affordable, easy to set up, and often offer the convenience of battery power. However, the LED light share a similar weakness to ring lights. Their light source is relatively small, resulting in potential uneven lighting when used for makeup application or content creation. To mitigate this, setting up two panels, one on each side of the subject is often necessary. However this setup can create harsh lighting, emphasizing textures and shines on the subject. Additionally, LED light panels require the subject to be in close proximity to achieve desired lighting effects.
Pros:
-Affordable ($50+)
-Small and compact
-Using it to selfie & capturing close up shots from Neck up
Cons:
-Using it to illuminate your subject during application
-Harsh light that can emphasize textures and shine
3. LED Continuous Light
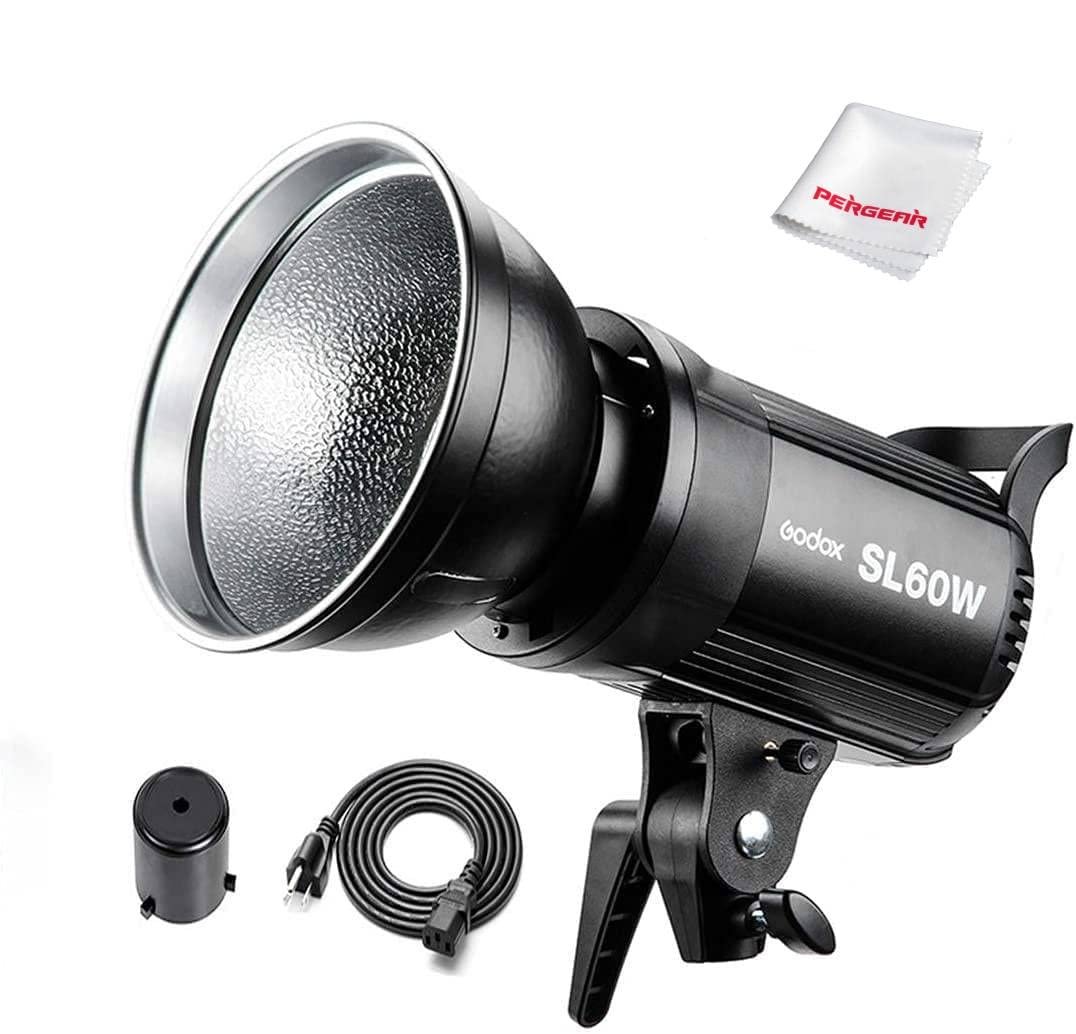
LED continuous lights are a favorite among many due to their versatility, interchangeable modifiers, powerful output, and reasonable pricing. The key advantage of these lights lies in their ability to utilize modifiers, allowing for customization of lighting styles such as harsh light, soft light, and a wide light source. When used without modifiers, these lights typically come with a small silver reflector. By positioning it high on a stand, around 6-10 feet behind you, it can mimic the effect of direct sunlight on the face, evenly illuminating your subject whether slightly to the left or right. This lighting setup can be ideal for makeup application as it highlights every detail and shine, providing a clear view of the finished look. However, it's important to note that without a modifier, the bright light shining directly into the client's eyes can be uncomfortable. Therefore, it is recommended to position the light source higher, shining down on the subject rather than straight on and directly into their eyes. This ensures a more comfortable experience for the client while maintaining the desired lighting effect.
Pros:
-Reasonably priced ($130+)
-Brighter output
-Versatile
-Allows interchangeable modifiers
Cons:
-Bigger, heavier & less compact
-Higher price point
Now, let’s talk about light modifiers. They are essential accessories for LED continuous lights. It's important to note that each light has its own specific type of mount for modifiers to attach to. For example, the Godox SL60W uses the "Bowens Mount" system. When choosing modifiers online, ensure they are compatible with the Bowens Mount or it will not fit.
In this article, we will cover four common types of modifiers: white umbrellas, rectangle softboxes, octoboxes, and honeycomb grids. These modifiers offer various ways to shape and control the light output, allowing you to achieve your desired lighting style.
White Umbrella

The white umbrella is a versatile and affordable light modifier that offers several benefits. It is lightweight, compact, and capable of creating a wide spread of soft light. Whether you intend to use it for creating content at home or during makeup application, the white umbrella is an excellent choice. The key advantage is its ability to produce an even spread of light, resulting in softening the subject without harsh spots. Additionally, it does not emphasize textures or shine, making it ideal for both photo and video content creation. With its wide coverage and ability to create a pleasing and diffused lighting effect, the white umbrella is a valuable tool for Makeup Artists.
Pros:
-Affordable ($15+)
-Light weight & compact
-Wide spread of light
-Soft light
Cons:
-Less shadows & dimensions
2. Rectangle Softbox

The rectangle softbox is a commonly seen light modifier in photo and video studios. It resembles a transitional window and provides more directional lighting compared to a white umbrella. This means that the light from a rectangle softbox doesn't spread as wide, allowing for the creation of dimensions and shadows depending on the placement of the light. A useful tip for identifying the modifier used in a photo is to closely examine the iris of the subject, as it will often exhibit a distinct shape corresponding to the modifier. The rectangle softbox offers a more natural lighting effect, especially when aiming for a window-like ambiance. The size of the softbox also plays a role, with larger boxes producing softer light. Think of sitting in front of a window while doing your makeup as a reference for the desired effect.
Pros:
-Reasonably priced ($60+)
-The most natural light that resembles a window
-Soft & even light
Cons:
-Takes longer to set up
-Heavier, bulkier and requires more space to set up
-More moving parts
3. Octobox

The octobox is a favored light modifier, offering similar characteristics to a rectangle softbox with a distinct difference in the reflection shape in the subject's eyes. It delivers soft and even lighting to the subject, making it ideal for both content creation and makeup application. However, it's important to note that setting up an octobox requires more time and effort compared to other modifiers. It is heavier and bulkier, making it better suited for studio or home office use. If you need a portable light for on-location makeup application, the white umbrella modifier is a suitable alternative. It provides a similar effect but is quicker and lighter to set up, making it more convenient for mobile applications.
Pros:
-Reasonably priced ($100+)
-Soft & even light
Cons:
-Takes longer to set up
-Heavier, bulkier and requires more space to set up
-More moving parts
4. Honeycomb Grid Add-on

The honeycomb grid is an additional accessory that can be used with a rectangle softbox or an octobox. Its primary function is to introduce more shadows and dimensions to the subject. By using a grid, the light is directed in a single direction, preventing it from spreading outwards. While this may result in a slight loss of brightness, it is an effective method to reintroduce shadows and create a more three-dimensional look to your subject. If you find that your images appear flat and lack depth, the honeycomb grid is an excellent tool to bring back those desired shadows and add dimension to your subject.
Final Takeaway
In conclusion, understanding lighting is more important than buying the newest phone or expensive camera. Good lighting is essential for great images, regardless of the camera you use. Even a cheap phone or camera can produce excellent results with proper lighting. Personally, I have expensive camera equipment, but I prefer using my phone for social media content.
Below I linked my amazon list of products that I recommend. Please don’t just buy the stuff and expect automatic results. you have to spend time researching, and educating yourself so in the future you will know how to see and control light and create the vision that you want. If you are like me, that need someone to teach you, DM @akccreatiestudio about a virtual or in-person lesson if you are in NYC.
submit your topic suggestion to hello@akccreativestudio.com

5 Important Types Of Artists You Will Run Into Throughout Your Makeup Career
1. The artists you started with
You’ll come across a few individuals who started at the same time as you and that you share the same goals with, to become a Makeup Artist. In this industry, you never know where someone will end up. Some will become successful, some will stay at the same place, and some will quit. These individuals are important because you are all going through the same struggles and can help each other along the way.
2. The artist that will become your mentor
There doesn’t have to be an official interview for someone to become your mentor. A mentor is someone that wants you to succeed in the long run, and helps you avoid mistakes that he or she already made so you don’t have to go through them, someone that is there to help you without any expectation. At first, you might not like this person’s feedbacks or not even see the positive in what they say. One day, you will look back and understand why they were the way they were and said the things they said. Your mentor will inspire you and you will continue to look up to them no matter where you are in your career.
3. The artists that never get satisfied
Throughout your career, you will encounter many artists with different personalities. Some will be kind, some will be mean, and some will never be satisfied no matter what you do. They might make you question yourself as an artist and if you’re even good enough to continue. One day, you will realize how important it is to cross path with these individuals because they give you perspectives and help you decide what kind of artist you want to be down the road.
4. The artists that want you to succeed
These are the people that genuinely want you to succeed, when you tell them you booked your first major gig, they want to celebrate with you and they always believe in you even when you don’t believe in yourself. Having someone that has faith in you even when you don’t can help you overcome the hard times in your career when you might not be motivated to keep pursuing this path. You want to surround yourself with these people from the beginning and hopefully one day you will be like them to other artists.
5. The artists that only show up when you succeed
People that come and go from time to time, but mostly appear when they see you are doing well or if they need something. These people are unavoidable and you will come across many of them throughout the years. It’s important to recognize this behavior at an early stage so you can take it into consideration.
In the end, every artist you run into throughout your career will play a huge role into shaping you into the artist you are. Anna the intern said this is too short as a conclusion, but I ain’t getting pay for this, so take it or leave it. Don’t worry if you find a lot of grammar error. That’s just the way I speak.
submit your topic suggestion to hello@akccreativestudio.com

Color Theory For Makeup Artist | Using Primary Colors To Create Foundation
After being a Makeup Artist for the past 8 years. Understand color theory is probably one of the most essential tool you can have. As we grow as as an artist, we stop looking at brand names or categories of makeup; we start mixing; creating colors and textures that we envision. It’s fun and magical. In this video, I demonstrate how to use primary colors to create my foundation shade. I challenge you guys to try it! once you get it, its an amazing feeling! Post in your story and tag me in it! @vanmakeupnyc
submit your topic suggestion to hello@akccreativestudio.com
10 Tips On Taking Better Makeup Photos Of Your Clients With An IPhone

Taken with an iPhone 15 Pro
This is one of the topics that I get asked over and over again. As we all know, a picture says thousand words! Especially now that Instagram is the most used platform in the beauty industry. It’s extremely important that we post quality content because whatever we post is how viewers will think of us. I can’t tell you how many talented artists I know that have Zero clue on how to capture the shot properly to represent their work. Here are 10 tips that will help you have a better understanding on how to get a better photo with your iPhone!
1. Details During Applications
The foundation of a good makeup photo is YOUR actual makeup. If something does not look good in person, then I can promise you it won’t look good in photos. Simple as that. It is very important that you train yourself to see when something is not right before you even pick up your camera. In the early days of my career, you have no idea how many times I thought my makeup was beautiful. I went home, to look at the photos I took, the brows was not brushed into place, the corner of a lash was not glued down, baby hair across my client eyeballs, and the worst is the foundation shade does not match the chest. Yes we all make mistakes, and we can only learn from it. So keeping a keen eye during your applications can save your photos.
2. Understand Your iPhone
Most of us usually just pick up our phone and just snap away. It’s incredible how our phone pretty much calculates everything for us to take a picture but here are some tips and tricks that I learned over the year that can definitely improve the quality of your photos.
-Turn your screen brightness to the highest setting (this will help you see if a photo is exposed properly).
-Tap to Focus. Every time you take a shot, you should tap on the subject’s face for the camera to focus
instead of letting the phone decide for you what it wants to be in focus.
-Tap for Exposure, after you tap on your subject to focus, you can tap on the square again and slide your finger up and down to adjust proper exposure. Your phone usually will do it’s best to calculate proper exposure but from experience, sometimes it’s too bright and sometimes it’s too dark.
-Your back camera will always be 10x better than your front selfie camera.
3. Look For Light
This is probably one of the most important tips I can give you. You need to understand that natural light will always be better than any other light sources. This could be a topic on its own so I am going to keep it as simple for you as I can. Whenever you arrive on location for your client, always try to find a window nearby because that way you will already have a spot in mind for you to take photos after the application. One important thing to remember is when you are using natural sunlight, you have to make sure all other light sources is turned off. If you are in a hotel room with a window, turn off the ceiling light and lamps. Usually if I don’t find a window, I don’t even bother with getting a shot because I know it won’t showcase my work how it supposed to.
4. Angles
Just because you like a certain angle of yourself, does not mean your client feels the same. Always ask them which side they prefer to be photographed on, how they usually take selfies, etc. That way you can have a better understanding of what they prefer and not waste your time snapping 100 photos that they are going to hate. Trust me, you’ll be surprised how many times I think a shot is beautiful, but they hate how their nose looks, eyes, chin and even hair look. I’m sure you feel the same when someone else take a photo of you and think it looks so good and when they show it to you, you actually HATE it but bite your tongue and say anything.
5. You Are NOT a Photo Retoucher
This photo retouching thing is getting out of hand. I have no issue with photo retouching, but I do not support makeup artist just downloading free app on their phone thinking they are a professional photo retoucher. Just listen to me, DON’T DO IT. That’s a specialty job, and people are getting paid a lot of money to do it and you are not one of them. Most of the time, these free facetune apps destroy your work more than improving it. You can probably get away with it if your audience is mostly everyday consumer but if you plan on working with a big team of creatives, photographers can instantly spot it and they will never hire you. If you honestly have interest in retouching, go sign up for a class. Invest in this new knowledge but do it the right way!
6. Different Types Of Lighting
This is another one of those topics that I can spend a whole day talking about so to keep it easy to digest, I am going to focus on 3 different types of light, Natural/Window, Ring Light & Softbox. I already told you guys I will always choose natural light over any other light source, but I understand we won’t have that during the evening. A lot of make-up artist use a ring light as an alternative option but 99% of the time they use it incorrectly. Remember the size of your light source will determine how close you need to be to get the best quality of light. A ring light usually will have a higher contrast so it’s great to showcase colors and texture. A ring light is not for full body or half body shots. It’s ideal for head shots! You should be standing no more than 2 feet away and again there should always be only ONE light source. If you are using a ring light, make sure everything else in the room is off. Softbox basically replicate a window light because of its rectangular shape and it’s the softest light out of the three. Therefore, it will tone down texture on the skin. Last reminder, always turn off all other light sources!
7. Framing
DO NOT USE THE CAMERA ZOOM! AGAIN, DO NOT USE IT! If you want a close up shot, you can always take the photo and crop it in closer after. Whenever you zoom, you will sacrifice the quality of your camera. Always keep your subject in the center of the frame, because your camera lens is a wide-angle lens so when you put it really close to someone’s face, it can warp it and make your forehead look like ET! Keep your clients face away from edge of your phone! You can always reposition it after!
8. Background Choice
Keep it plain, you are not trying to do an editorial shoot with your client, you trying to show case your makeup. Avoid, taking photos with a toilet in the background, find a plain wall, if someone is behind your subject, kindly ask them to move so you can get your shot.
9. Focus
This is literally my worst nightmare, when someone post a blurry photo. I accepted the fact some people can’t visually see when something is out of focus. I will give you tip! After you take a shot of your client, zoom in as close as you can to the pupil, if the eye is out of focus, the photo is out of focus. Practice this on your own, review some of your old photos and see if you can see the differences. Another tip is to keep your hand steady, if you shake your phone while taking the photos, most of the time it will be out of focus.
10. Clean Your Lens
I wish someone told me this, I actually just learned this a year ago! Every time you put your phone in your pocket or handbag, you might leave fingerprints on the lens itself which can cause the photo to be extremely soft. Some people might like that effect but not me. Please wipe your lens before you take any makeup photos of your clients. Trust me you will thank me later!
Well, hopefully you enjoyed this read and helps you improve your photo skills. It will take a bit of practice but eventually your content will start to improve if you follow these 10 tips! Honestly, it’s incredible what our phone can do, you don’t need to spend a lot of money on camera equipment. Everything can be done with our iPhones in this day in age!
I want to shout out to Ken Martinez who is an amazing MUA for helping me edit this article so I sound good!
submit your topic suggestion to hello@akccreativestudio.com
10 Ways To Make Agency Models Hate You On Set As Makeup Artist
Today’s topic is going to be a little bit different than usual. I always hear makeup artist talk about what they love and what they hate about working with talents but today, this is not about us! We are going to spice things up a little! I reached out to 10 agency represented models from all over the world asking them what their biggest pet peeves are when it comes to makeup artist on set. End of the day, the most important things to me are making the client happy, taking care of the talents, make sure they feel comfortable while getting the job done. Listen, we all have things that we love and hate but in my opinion it matters very much to take a moment and recognize what these people have to say. It might help you down the road to be a better artist. Feedbacks are the key to success!

Agnieszka Artych | State Management NYC | @agnesartych
“I find the most irritating when the makeup artist comes on set with dirty brushes. Thankfully it doesn’t happen that often anymore! Makeup artist became more aware that healthy looking skin for models is crucial! We spend a lot of time, effort and money on our look, so dirty brushes are simply a no-go!”
-Well said Agnes, sanitation should be on the top of your list as a makeup artist. I know sometime things get hectic, we are in a rush and just use the same brush on two different models or not having time to clean our brush the night before. Remember, you wouldn’t want that for yourself so stop with the excuses. Keep your kit clean.

Olga Vorosilova | APM NYC | @olgavorosilova
“When makeup artists put lipstick with same finger to a line of the girl or with a single brush…. The worst”
-I see this happens quite often, and so happy that Olga brought this up. Makeup artist love applying products with our fingers but sometime we forget how dirty It is, especially if we going down a line of model touching them up with the same finger. Another no-no, thank you!

Irka Canseco | Click NYC | @irkacanseco
“When Makeup Artist applies product on your face but rubs it in a foreful downward motion. When it happens im like “ well there goes my anti aging efforts out the window”
-Irka have a great point, sometime we love rubbing skincare into skin but I definitely seen some moment where it’s quite aggressive. Im sure makeup artist have their own reasonings, but when your model is feeling uncomfortable then I think we need to tone it down a notch or three. Applying skincare with an upward motion is definitily a good tip! WE DON”T WANT NO WRINKLES!

Greta Rolli | Elite Model Management NYC | @gretarolli
“Its awkward when the markup artist isn’t friendly”
-Yes I agree, no one want to spend a 12 hours day with people that are bummed out or just stressful in general. I am so thankful that I get to call this my career. We have a wonderful job, we get fed, get paid and working with incredible creatives and talents. Theres absolutely no reason why anyone should bummed out on set. Greta, I got strawberries cut up ready for you.

Priscilla Huggins Ortiz | Wihelmina Models | @pricilla_huggins
“I hate when Makeup Artist have bad breath, Period. You Should know you’ll be all up in someone’s face so take care of it.”
-There it is guys! straight to the point. Thank you Priscilla for bringing this up, no one want to spend the whole day around bad odor. I always carry mint for myself and also for talents. Just a good fresher for both! Definitely an essential product!

Loli Laneova | EMG Models | @lolilaneova
“It is extremely irritating when makeup artist who is a smoker and doesn’t properly wash his or her hands after smoking a cigarette. It is quite uncomfortable having hands that smell like an ashtray literally under your nose for hours.”
-This is definitely something that happens way too often and I am very happy that Loli expressed this. Please be considerate on others and clean your hands after you smoke. I personally hate the smell of cigarettes so I can only imagine how horrible it is to sit through a makeup application smelling it. Take care of your model!

Kate Olthoff | Marilyn NY | @kateolthoff
“I don’t like it when after a long day of shooting with a bunch of makeup on and the makeup artist don’t have any proper makeup wipes to give you to actually get the makeup off. I can’t tell you how many times that happened to me.”
-Yes, yes! that’s the honest truth. Alot of artist just assume after a shoot is over, they can just pack and leave. It’s not the talent’s job to bring their own makeup removers and skincare to apply to themselves after the shoot. Your job is not done until you ask the talents if they would like you to remove the makeup or if they like you to leave some makeup wipes and moisturizer for them to do it on themselves.

Megan Puleri | Wihelmina Models | @meganpuleri
“When makeup artist drop a brush or sponge then proceed to pick it up and use it on your face”
-That is absolutely unacceptabel, and should never happen. Again, you wouldn’t want someone to do that to your face, so don’t do it! put the brush aside and use another one. Also for people that love using sponges, make sure you have more than one so you can use different sponge for different models on set. Thank you Megan!
Mariah Castro | Marilyn NY | @mariahcastro__
“When makeup artist use their hands on my face or lips ESPECIALLY after eating. The Model you are doing it on is so incredibly grossed out but doesn’t want to be rude and call them out.”
-As much as I love catering and munching on snacks while im on set. I will always wash my hands and have sanitizer with me before I go back on set touching up talents. I think a lot of times it happens so subconsciously that we don’t realize we are doing it, so thank you Mariah for reminding us on this!

Alexis Lee | Fenton Model Management | @alexisleehart
“When makeup artists don’t use disposable mascara wands. It’s gross to me when they dip it back into the same bottle”
-Thanks Alexis for calling this out! as a makeup artist we need to be conscious on making sure to use disposable wands at all time. It doesn’t matter if you are in a rush, or last minute touchups, double dipping won’t slide and you will get call out sooner or later!

Meaghan Waller | Women360 NYC | @meaghanann
“I think the worst thing is when makeup artists use dirty brushes, or their hands without hand sanitizer.... especially AFTER EATING WITH THEIR HANDS. I just think unhygienic makeup artists are disgusting and at the end of the day, our face is part of our job, and for someone to so carelessly possibly fuck with that... it just sucks man. We are all there to do a job, and it would be nice if (some) makeup artists took a little more pride in their work and come in WITH clean brushes, brush cleaner, sanitizer, and non expired products. The amount of infections, and reactions to dirty or expired products is the most INFURIATING thing.”
-I have nothing to add to that, Meaghan made it pretty crystal clear. Don’t mess with her.
I want to shout out to all these beautiful humans for supporting me on this article. I hope this will give everyone an inside scoop on what models have to deal with on a day to day basis. It happens more than you can imagine. The funny part is, when I reached out to all these talents asking for one petpeeves, everyone already had a list. We can do better as creatives! Love you all! please give these 10 talents a follow! If you enjoy this, please leave me a feedback below and your IG so I can follow you!
submit your topic suggestion to hello@akccreativestudio.com
Getting Into NYFW As A Makeup Artist: A How-To Guide
Prabal Gurung, NYFW
When I first started my career as a makeup artist in 2014, my biggest goal was to get booked at New York Fashion Week. As we enter 2019, I’ve now worked over 100+ shows as a professional in the industry, including NYFW. While I may not have a vast knowledge of designers, I do know that Fashion Week can be a dream job in this industry. Before we continue, I’d like to clarify something: I can’t guarantee that these tips will get you a spot in NYFW. These steps are a short list of things that I’ve learned through my own journey to Fashion Week. My goal here is to give some insight into the process.
Location, Location
-This is a huge factor. Sometimes, your goals and passions require you to make some sacrifices. Though it’s not impossible, the chances of getting booked for NYFW as an artist that lives outside of NYC are slim. This is simply because the city is saturated with incredible artists, there’s no need for a brand to outsource their artists.
Work For A Brand
-I got onto my first NYFW show after working for MAC, a brand that has supported Fashion Week for years. I highly recommend doing your research and finding out which brands are most commonly involved with NYFW. While this can be a long and sometimes tedious process, it’s also something that can help you work towards achieving your goal. And although this was something that helped me, it wasn’t without its obstacles. For example, MAC requires artists to pass through five levels of certifications before reaching “Fashion Show Certification”. Even passing this, there’s no guarantee you’ll get booked. Staying motivated and working hard through this process will help to show your dedication.
Assist Artists That Key NYFW Shows
-Key artists typically bring other MUA’s that they’ve worked with in the past to their NWFW team. This means you should always keep an open mind to assisting other artists and building up your relationships in the industry. This includes taking the time to reach out to agencies to be placed on their assistant list. Doing this early on in my career opened a lot of opportunities.
Work Hard & Be Kind
- “Be kind”, the tattoo on my left hand, is a perfect reminder. You never know who you may work with or run into on the street, especially living in NYC. This means that a single interaction could help make your career. With this in mind, always remember to work hard on every job you get, paid or not. Just remember that having a negative attitude at a job won’t get you very far. Hustle, do good work, and be a nice person.
Get on Unofficial NYFW shows
-Follow the official NYFW calendar on www.nyfw.com. This showcases all of the official designers and shows during Fashion Week. In that time, there are hundreds of other unofficial/smaller events that are worth keeping an eye on. Keep in mind that these may be easier to get involved in when you’re just starting out. They can be small, sometimes a bit under-organized, and some even use false advertisement calling it “NYFW” to get creatives to support the event for free. but they’re a great way of introducing yourself to the fast pace of Fashion Week.
Make Sure Your Portfolio Is Always Ready
-If you’ve kept up with my articles, you’ll be familiar with my belief that Instagram is one of the most powerful platform for the makeup industry; who needs a website they pay for, or a printed portfolio that needs carrying around, when you can use a streamlined social media platform to showcase all of your work. This doesn’t mean that you have to post every day or every look you create. Think of Instagram as your book; the first 6 photos are your first impression. A quick glance at your page should represent and showcase you as an artist. Remember: quality over quantity.
Being In The Right Place At the Right Time
-Honestly, this play a huge roll in our industry. From my experience, at least. You have to be flexible and available. There was a time, a week prior to New York Fashion Week. I remember constantly checking my email hoping to get book on any shows (Paid or Non-Paid), it never came. One morning I received a call from a close friend asking if I was available that very moment to support an event. Her flight got delayed and was not going to make it. Turns out it was for NYFW. I grab my kit, jumped in a car and that was that.
All in all, staying motivated and doing your own research will always give you a clearer insight on what steps you need to take in order to reach your goals. If someone had told me five years ago that I’d be working NYFW or the Victoria’s Secret runway show, I would have laughed them off. Now, I anticipate having a full schedule for NYFW without having to worry about it. Each season it gets easier, and each season you gain more experience to help you in the future. If you made it this far, thank you so much for reading. I’d love to stay in touch, so don’t forget to drop your Instagram handle when you leave me feedback! @vanmakeupartistry
IMPORTANT:
NO ARTISTS SHOULD PAY TO WORK FOR NYFW. YOU CAN WORK FOR FREE IF YOU CHOOSE TO BUT DO YOUR RESEARCH TO SEE IF THE EVENT IS ON THE OFFICIAL NYFW CALENDAR. IF IT’S NOT AND IT’S BEING PROMOTED AS NYFW, YOU SHOULD KNOW THAT BEFORE AGREEING. ANYONE CAN DECIDE TO CREATE AN EVENT DURING NYFW AND CALL IT NYFW, SO PLEASE DON’T FALL FOR IT. THERE ARE ALOT OF BAD PEOPLE WITHIN THE INDUSTRY TAKING ADVANTAGE OF NEW ARTISTS FROM OUT OF TOWN AND THE LIST OF NAMES I GATHERED IS GETTING LONGER AND LONGER.
Thanks to my amazing friends Jenn Marasca & Courtney Musick for helping me proof read!
submit your topic suggestion to hello@akccreativestudio.com
10 Things You Can Do Now To Improve Your Career As A Makeup Artist

New York City, 2019
Take A Photography Class
-I would never have thought that photography and makeup would intertwine with one another. Boy, was I wrong! I see so many incredible artists out there doing stunning makeup but not being able to capture it in a photo, and most of the time the photo they take actually ruins their work. Don’t get me wrong, i’m not telling you to go out and buy an expensive camera setup and become a photographer, I just think it will help you to learn how to capture a clean, well lit photo and see the difference between a great makeup photo and one that may not show off your work to it’s full potential.
Get Yourself A Mentor
-The best thing I’ve done for my career is find myself a mentor and someone you look up to. This will take time, don’t expect to ask for something and then receive it immediately. A lot of people reach out to me and casually ask ‘Can I be your assistant’? or ‘I want to assist you’. I’m letting you guys know now, that will never work and chances are the artist will ignore your message. If you truly want to assist, the least you should do is write a small summary to let them know who you are, your background and why they should invest time in you. Im a nice person so I usually will answer everyone.
Ask For Feedbacks
-I love feedback and I strive for it constantly. This is the best way for me to understand what I need to work on to improve myself and my artistry. The day that you think you know it all, is the day your career will fall apart. Sadly, this industry is filled with people that think they know everything and think they are the most talented. There is no right or wrong but I hope that none of my friends turn into one of those artists. Instead of telling yourself how beautiful your work is, ask your model if they like it and ask your friends what they think about the makeup because in the end that is what matters the most. In our field, our goal is to make our clients happy. It’s not just about you.
Practice On Your Days Off
-It’s shocking to me every time I come across artist that doesn’t want to do makeup because it’s their day off. If you call this your career and passion, you should be happy to be able to play with makeup anytime. One thing i’ve learned is that the retail makeup industry usually destroys every bit of passion in an artist so it’s very important to acknowledge that. I am constantly practicing on my days off, if I can’t find a model, you will find me in a Sephora or a cosmetic store spending hours just playing with makeup to better understand different textures and tones. My wonderful friends in Mac stores will let you know because they all make fun of me for doing that on my days off.
Clean Up Your Instagram
-Im gonna be pretty straight forward to you guys on this one.. It doesn’t matter if you like or hate social media. Know that it is extremely important and your client will ask for it. In this generation, social media is more important than having a website and a printed portfolio. A client can easily go on your page and glance at your work and know if they will hire you or not. Please keep your social life and your makeup separate. Whether you like it or not, your instagram feed is a representation of your voice and your work as an artist. In the past I didn’t think instagram was that important but now, 90% of my clients connect with me through that platform and this can be the deciding factor for you getting booked or not.
Start Testing With Photographers But Be Specific
- Let’s be clear, I know sometimes it is fun to do editorial shoots but they don’t really matter until you start doing major campaigns with Chanel, Dior or Louis Vuitton. Most of the time editorial shoots have no benefit for you and it usually will take the focus away from the actual makeup. When you are first starting out, try your best to do ‘beauty’ test shoots. Something clean in the studio that showcases hair and makeup. Those images are what is going to get you booked, not the one with a giant hat covering the model’s face or a splash of paint across your model. Just trust me on this. Photographers will try to persuade you to do editorial but don’t waste your time.
Stop Relying On Filters & Face-tunes
-If you want to throw your career out the window, this is the best way to do it. I’ve learnt that people truly believe that they look amazing after putting on a filter and using face-tune, so I can’t blame them for it. You do whatever makes you happy. Know that when you take away every bit of texture and pores from your skin, you look like an alien. I don’t want people looking like aliens so please just don’t do it. There is no problem editing your photos, but learn how to do it properly. Just go on youtube and I’m sure you will find many free tutorials. This is the worst thing that has happened to the makeup industry.
Assist Other Artist
-If you have days off, try to assist other artists even if there’s no pay. Watching others work really teaches you different techniques. It doesn’t always have to be an agency artist or someone huge, even if it’s just your friend doing a job. Ask them if you can tag along and help them clean some brushes. I love assisting because it usually leads me to future jobs. Sometimes if that artist is not available they will most likely recommend you to do the job for them since you have already built a relationship with the client. It’s a win-win.
Don’t Focus On Brand Names
-The last thing I want to hear from a client or another artist is “What brand is that?”, as an artist we have to find products that work, are reliable and are multi-use. Just because something is expensive and has a fancy logo on it, doesn’t mean that it’s going to work the way you want it to. If something is labelled as a lip product, it doesn’t mean it can’t be used on the cheek or on the eyes. You get the point? When you start working on major campaigns and clients, they don’t care about what brand you have in your kit, they care about how the makeup looks and lasts while shooting.
Practice Doing Makeup In All Environment
-You are not always going to have the luxury of doing someone’s makeup without them moving around, hairstylist yanking on their hair, or someone doing nails. This is very essential because you should train yourself to be able to do makeup in any condition. I know it’s stressful to try to get a perfect red lip or winged liner when they are teasing their hair but it is what it is. Practice now so you will be ready when the time comes. After doing Fashion week for so many seasons, it really coached me to be able to do any type of makeup in any situation. The reason i included this on the list is because recently I worked with an artist who didn’t want to do makeup while the hair team was working on the model. They got upset and stressed out everyone. In conclusion, don’t be that person that bums out the whole team because chances are you won’t get a call back. PS. I was the photographer, they definitely won’t get a call back.
I hope these article helps. The only reason I write this is because there’s not much information online about these topics. Almost everything on YouTube is about cut crease and instagram makeup. I am constantly learning and hope to share with you everything I pick up along the way. I don’t want people making the same mistakes that I made during my journey. Knowledge should be free, I am happy when someone achieve their goals. If you enjoy this read, please leave me any feedback along with your instagram account so I can keep in touch with you!
Follow me on Instagram! @vanmakeupartistry
Shout out to Ashlee McKinnon for helping me edit this article to make it sound legit. thank you!
If you find this article helpful, share, leave a review below and if you wish to buy me a coffee (Venmo @vanktr | Zelle vanktr@gmail.com)
From Pushing Carts At Walmart To Becoming A Makeup Artist In NYC

We all have a story to tell. I hope mine can help a few of you who feel stuck or unsure on what to do with your journey. The reality is, no matter how much we plan, sometimes it just doesn’t go the way we want it to go. My mom & dad are incredible parents who decided to drop everything that they worked for in Vietnam to move our family to the US just so we can have a chance to live a better life. My mom was selfless and she had one goal, to work extreme hours to save enough money to buy a beautiful home for us. Everything she planned stopped when she went into a coma after a stroke. I thought I lost her when the doctor said to me “she won’t make it, call your family”. This was the moment that shifted my perspective and belief in life. Everything I thought I knew and planned out suddenly became empty. The lesson I learned is that life truly is short, don’t over think and never over plan because honestly everything can disappear in a blink of an eye.

Mom always smiling!

Stroke got nothing on her!

If she can smile through the darkest thing, there’s no reason for me to ever be in a bad mood.
I have worked every kind of job you can imagine from packing underwear that customers have opened to check their sizes at Walmart, pushing carts at a grocery store through countless winter storms, washing dishes in a restaurant till 2 in the morning smelling like Indian food, heavy construction work, fast food restaurants, rock climbing instructor, family portrait studio photographer, and now I am a Makeup Artist in one of the best city in the world, New York City. Everyday I wake up, I feel so thankful and happy that I can call that my career.
Throughout high school and college I dedicated all my time as a track athlete trying to break the Vietnamese record as a Pole Vaulter which ended sophomore year because I wanted to fully experience college. Then I wanted to travel so I joined a rock band. We got signed to a label and it allowed me to travel and see the world with my friends. It was incredible, life was fun, full of surprises and living on the edge. I’ve traveled to pretty much most of the states on the US map and experienced things that school could never teach me.

Rock Climbing days

Pole Vaulting Practice, Westborough MA

College Practice

Music Life!
Just when I thought I got life all figured out, I’ve decided to do something ridiculous. At the age of 25 in 2013, I told myself I want to become a makeup artist. Speaking from a guy that thought makeup is a waste of money, makeup is for girls only, refuse to take a step into a cosmetic store, and the person that got upset when my ex girlfriend spent more than 10 minutes getting ready (Sorry Leslie).
My friend Ashley Grant will take up most of this article and i’ll tell you why. Ashley was getting ready one night and it randomly sparked an interest, so I asked if she can teach me. Poor Ashley said yes and not knowing what she was about to sign up for. I remember clearly she had this Holiday makeup set from Sephora that opens up and contained everything from eyes to cheek to lips. I thought it was the most amazing thing ever although it took her a full week to explain to me what a face primer was. I went to my sister and asked to see if she had any makeup products I can borrow and I'm sure at that moment she had a million things running through her head but she didn’t question me because that’s the person she is, supportive, no matter what.

Ashley Grant with her unconditional support

Im sorry Ashley!!! hahahah first week of makeup lesson!!! I am dying laughing.

My sister is my number one supporter and the person that motivates me to do my best.
Ashley came over pretty much 3-4 times a week, sometimes late at night and would stay till 2am in the morning just so I can practice on her, making her look like a gremlin most of the time. Pretty sure our parents thought we were up to something else. She stuck with me throughout the entire journey and I give her full credit for my success because without this woman, I really would not be sitting here typing you this. The same week, I asked her what company I should apply for. She said Mac Cosmetics so I went to my local Macy's in Shrewsbury, MA with a small Mac counter of 4 staff. I gave them my resume listing “Rock Climbing Instructor” as my first job. You already know how this is gonna end. Well to keep it moving, they didn’t give me a job, haha.
The idea of NYC randomly crossed my mind so I printed a stack of resumes and asked Ashley if she would do a road trip with me to NYC for a day. I dropped off my resume at every single Mac store in NYC and no one walked out of the office to speak to me. I felt embarrassed and destroyed inside. Right before our bus back to Boston, I noticed there was another Mac store in Soho. Why not right? An individual by the name of Michael who was a manager at that store stepped out and introduced himself to me. I gave him my resume and told him I don’t know how to do makeup but I want to learn and I will work hard.

Stack of Resume in NYC
A month went by and I already gave up on becoming a makeup artist. My phone rang and I remember very clearly, the woman saying “Hi, my name is **** with Mac, we wanted to let you know there is a position open and we would like to have you come in for an interview”, I said to her “you got the wrong number, I never applied at the apple store for a job” so I hung up and then a few moments later it dawned on me and realized what I did.
Well, they ended up giving me a job in FLUSHING, NY. For anyone that has never been there, it was basically China even though I wanted to work in NYC! I packed my backpack, without knowing what I am about to get myself into, and moved to NYC! But little did I know, a tiny counter of 5 staff taught me everything I needed know as a makeup artist and also how to be a kind person. (Shout out to Mei, Steph, Annie, Jini & Nicole) I am forever thankful that I had them in the beginning of my career because they molded me into the artist that I am today. My goal was to do fashion week, Victoria Secret Fashion show, campaign shoots and celebrities, but back then it seemed like it was impossible.

Flushing, NY practicing with Nicole & Annie

My first manager Mei Cheng trying to demo on me, I cried a lot that day. This woman speaks, Chinese, Spanish & English.
Three years went by, I decided that retail, living paycheck by paycheck, waking up everyday taking the same train to work and eating at the same 3 restaurants was not exactly the reason why I moved to NYC. I decided to put in my 2 weeks. It was scary, risky, and uncomfortable but I had to do it since I was not happy. That was one of the best decisions of my life. It allowed me to visit my country that I left in 2000 and that never been back since. I got to spend time with my relatives, backpacked through Thailand, Vietnam, Cambodia and everywhere in between by myself for a month and half. It felt incredible. Since then I try to travel at least once a year for “me” time no matter how busy life gets.
Backpacking through Southeast Asia!

Somewhere in Thailand.

My entire family in Vietnam that I haven’t seen since 2000!
Blending in somewhere in Vietnam.

Sometime getting lost is better than knowing where you are going.
The only problem is, I had no clue what I was going to do when I returned from my trip. I didn’t have a plan, a home, much money in my bank account or a job. Everything happens for a reason. The struggle was worth it and I made it out alive. In less than 3 years, I’ve supported New York Fashion Week every season with a full schedule, shot countless campaigns, built my own clientele, worked with incredible celebrities, received opportunities to work with some of the best makeup artists in the world. Oh and did I forget that I just achieved my ultimate goal? VICTORIA SECRET FASHION SHOW 2018!

New York 2018 Victoria Secret Fashion Show
Victoria Secret 2018! PINK CHAIR! 5 years to sit in it!

My model Sophie!

I love her! VS 2018

Incredible artists in NYC! Terry Barber, Michelle Clarke, Keri Blair, Fatima Thomas, Gisel, Chantel Miller, Regan Rebanal.
My favorite makeup artist that inspired me to treat everyone with kindness Romero Jennings

I even Proposed to Monique Lhuillier!

The beautiful Danielle Brooks!

Olivier Rousteing of Balmain
I am now 31 years old and my way of living life and my biggest advice for myself and others is to not be afraid to take risks to do what you love, even if it feels scary at the moment. Don’t just think about money because money will come if you truly love what you do because you will be passionately doing it. You know, it gets easier every time you take that leap of faith, I promise. Always surround yourself with positive people with positive energy because it is contagious. What got me this far in my career is definitely not just doing makeup. People care and see who you are as a person. Treat everyone with kindness, honesty, care about the people around you, and help them succeed because you never know, the person you are working with might become the next Kevyn Aucoin.
In conclusion, DON’T BE MEAN TO OTHERS and always remember, THERE'S FREE CATERING !!!!!!!!!!!!!!!!!!
Follow me on Instagram! @vanmakeupnyc
Thank you Pauline for the editing this article for me! She is also a makeup artist! go follow her! @paulineroquee

submit your topic suggestion to hello@akccreativestudio.com
10 Things I Wish I Knew When I First Started Out As A Makeup Artist

Lookbook Shoot, Mac Pro, NYC
1. Don’t waste your money on expensive products
In the first 2 years of my career, I was so focused on building the most perfect kit and buying the most expensive products, thinking that it would help me be a better makeup artist. In reality, you don’t need expensive products to create a beautiful looks. Products are just tools, while you are the actual artist. Focus on learning and practicing so you can be a better artist, because eventually you will be able to create any look without thinking about brands or pricing. You will start caring more about how the product feels, and how it looks.
2. Work for a Makeup Brand
I know this may be a surprise for a lot of you. I honestly can say that without the first 3 years of working with Mac Cosmetics, I would never have gotten where I am today. I started without knowing anything about makeup or owning any makeup products. Working for MAC allowed me to get an amazing education, real life practice on different face shapes, colors, and personalities. It teaches you how to multitask and be ready for whatever comes your way. And the biggest thing, it will help you build your kit because you get free products and amazing discounts. Who doesn’t want that!
3. Find a Mentor
This is a huge one - find a mentor in your area that inspires you and someone who is already at the stage in their career that you want to get to. Ask them questions, let them know that if they ever need an extra hand on a job that you are available to assist (paid or unpaid). They already went through all the steps, learned from their mistakes, so why not learn from them directly rather than making the same mistakes yourself? Also they will give you straight forward feedback so you know what you can work on to improve yourself. I do not like sugarcoating, and prefer to be told like it is because in the real world that is how it’s going to be.
4. Figure out the kind of makeup artist you like to be
I meet a lot of artists that want to be versatile because they feel like the more options they can offer to client, the more money they can make. They are not wrong because I did the same, I wanted to do beauty, editorial, bridal, fashion and special effects. Took me 4 out of 5 years of my career to realize that was a mistake and I wish i knew this when I first started out. I don’t want to do special effects, I don’t enjoy doing bridal, and recently I learned that I don’t love doing runway makeup. What I love is making clients feel beautiful for their events and creating beautiful fashion campaigns, and getting to a platform where I can bring aspiring artists with me so I can share them my knowledge and help them achieve their goal. That makes me happy.
5. Don’t just focus on testing editorial shoots
Listen, when we first start out, we always want to do the most creative makeup because that’s what we think it’s gonna book us a Tom Ford or Dior shoot. Honestly though, if you scroll through magazines, most of the time. the models just look beautiful and not with a triple winged liner or a bunch of paint splashes on the face. There are time when I am at a major shoot, I just put moisturizer on the skin, tiny bit of mascara, lip balm, comb the brows and that’s it. Out of the 5 years of my career, I’ve only been on one shoot that we did wild makeup for and it was a bold color liner. hopefully you get the point. You should focus on building a portfolio that showcases your makeup, and not with a bunch of stuff that distracts the audience from it. This is just my opinion.
6. Locations, locations
Your location is a huge factor in this industry. If you tell yourself that you want to work in fashion but you don't want to leave Colorado because you have a pet, a car, a nice apartment or a boyfriend/girlfriend then please leave my blog now, because nothing I say is going to help you advance in your career. Before I started makeup, I asked a friend where is the best place to be if I want to work in fashion. She said NYC. One week later, I packed my backpack and moved here. Definitely a huge risk that could make or break you, BUT you have to take risks sometimes. Dive right into the deep end or you will never know what’s out there. If I got a job at my local Macy’s in Shrewsbury, MA, I don’t think I would be sitting here typing this. There is nothing wrong at working at a tiny Macy’s but if you tell yourself you want “this or that” then you are going to have to make sacrifices, take risks and get out of your comfort zone.
7. Take Photos of your Work
Listen to me, when I say take photos, it doesn’t have to be a photoshoot. When you finish a makeup, take photos of it. We are so lucky that we are in an era that our phone can produce incredible images. Not only can it go into your portfolio, you can see your own work better. See if there is any area that needs improvement, or areas that you’ve done really well. I recommend every makeup artist should take a beginner photography class because it will help you so much understanding the basics of camera, compositions, and lighting. Hit me up if you want a class. I charge $99999999999
7. Say yes to everything
You have to pay your dues. I said yes to everything for the first few years. I worked for free but I gained knowledge, I mopped the floor on a set but I gained resources, I did coffee run for artists that I assisted but I built relationships. I know it sounds crappy but all those free jobs let me to huge opportunities. Put your pride aside, even if you know how to do something, just be quiet, and learn it again. If you want to be a know it all or complain about the pay not being good enough while you are just starting out, the chance of you being successful in this field is going to be tricky. Even now, I will still mop the floor and do coffee runs
8. Don’t stress out about little things
We are not curing cancer, so don’t let little things stress you out. Theres always going to be people that don’t like your work no matter how beautiful you think it is. There are all kinds of people in this industry, people that want you to be successful and also some that don’t feel the same. You, yourself have to be honest, kind and respectful. To me that is the key to success. Focus on you, and forget about all the other distractions because when you become successful, all those people will suddenly turn around and support you.
9. Take an art class
I never payed attention in art class, I was awful, hated it but now I regret that so much. Makeup is an art in a different form and on a different canvas. You have to understand color theory, shadows and highlights. You can do a beautiful makeup even if you are not good at drawing or painting BUT it is a huge bonus if you do because it will take you to the next level of artistry. I have been thinking to start taking art class to learn the fundamentals of it.
10. Focus on your client and not yourself
This industry is not about you, and what you want. You will be successful if you start listening and give your client what they want because in the end, if they are happy, they will always be loyal to you and call you back again and again. I come across artists daily that feel they have already mastered the craft, they have to do everything their way, and if the client is not happy, it’s the client’s fault. Let me tell you that is a huge no, no. I can assure you that if you act that way, it’s going to hold you back in your career.
Follow me on Instagram! @vanmakeupartistry
Thank you Neda for helping me edit this article!
submit your topic suggestion to hello@akccreativestudio.com
10 Things I Learned As A Straight Male Makeup Artist In The Industry

NYC
Take Care Of Your Skin
For 25 years of my life I don’t think I ever owned any lotion or moisturizer. I pretty much use a bar soap from head to toe and call it a day. I know right? Now that I am a makeup artist and after being yelled at by my colleagues, I believe it’s extremely important to take care of your skin, even if it’s just a basic skincare routine such as a moisturizer before you go to bed and when you wake up. I think a lot of men feels like it’s a “girly” thing or it’s too much work; that’s why they avoid it. Stop the nonsense! GO OUT AND BUY SOME SKINCAREN PRODUCTS!
Perspectives
Before I became a makeup artist, I knew nothing about females or the LGBT Community. Looking back, it’s so sad because there is so much more than just two genders. Working in the industry taught me to truly listen and have a good perspective for others and this world. We are not just a makeup artist, we are a also therapist. Most of the time my job is just to listen to my client sharing their life story with me in less than 1 hour. They tell me about their relationship problems, life/career goals, getting plastic surgery, wanting me to feel their brand new set of boobs, and much, much more.
Makeup is Expensive
Yes, it sure is. I remember when I first started out and needed cheap product to play, I went to target and went to the Elf Department. I thought $3 brushes were expensive. Imagine my face when I went to the Mac Store for the first time to buy a lipstick (I almost lost my mind! $16!!!!!). Makeup is almost like your medication, you don't just buy it once. Every couple months, you have to refill your basics such as foundation, concealer, mascara, powder and etc.
Makeup is Not Easy
I think most guys including myself think you can just quickly slap some products on your face and voila, it’s done. Little did I know that it takes a lot of time, patience, practice, struggle and money to even just do a simple makeup look. I hope guys who end up reading this article will listen to me and start to appreciate a little more what women go through on a daily basis - whether its for themselves or their loved ones.
Communications
I was so bad at communication in my past relationships, but now I realize being a makeup artist helped me so much. You have to be really good at communication to be successful in this industry. Most of the time we only have 5 mins before we start the application to learn about someone, what they like or hate, their skin type, where they are going, how much makeup they wear on a daily basis, what they think they want to look like, what they really want to look like, etc. There’s so much discussion that goes into a single look.
Makeup is Art
Listen - it’s not just winged liner. It takes so much practice and patience just to get one eye done, imagine having to do two identical ones! I always hated drawing & painting, but now that I am in the industry, I wish I paid more attention in art class because makeup is art. It is just a different format on a different canvas. Instead of drawing on a piece of paper, we are working on someone’s face.
Theres No Gender, Race or Color in Makeup
Absolutely no gender, anyone can wear makeup. It’s a form of freedom of expression. I wish someone taught me this 25 years earlier; I was always the guy that was all bummed out, sitting on the heater talking to the security guy when my girlfriend would go into Sephora. If you have an important event and have a giant blemish, it’s okay to put concealer on to cover it! I hope all the guys know that most Male News Anchors and Actors wear makeup on a daily basis before they go on air (NOT MATTER IF THEY ARE STRAIGHT OR GAY!)
Don’t Judge
Everyone can express themselves however they want. If they want to put a bright blue eyeshadow from lash to brows, let them be. If they want to wear a black lipstick everyday, they can do so. In no position should anyone tell them they are wrong; keep your opinion to yourself. Everyday I work with so many people ranging from all shapes and forms. Everyone has their own personal issues and battles. Don’t judge a book by it’s cover!
Makeup is A Career
If you told me this 5 years ago, I would have just walked away and laughed. Well guess what, I am in NYC working with some of the biggest brands and designers in this industry. On top of that, work makes me so happy because I get to work with beautiful people (and have amazing food delivered right to my lap #hereforthecatering). For the first time, I can say makeup is my career. I am so thankful.
It Can Change Someone’s Day
Listen, this is what brings me happiness in this industry. You have the ability to shape someone’s feelings. I have people that just went through a divorce, lost their job, got in a car accident, found out their boyfriend is cheating. Once they sit in the chair, I do whatever I can to make them happy or at least try to change their view on things. We have a lot of power as a makeup artist, don’t underestimate!
In conclusion, this is the best industry I could ever ask for. I work with the most stunning people on a daily basis. The only thing i regret is why no one told me about this when I first graduated high school!!!!!!!!!
Follow me on Instagram! @vanmakeupartistry
Shout out to Lauren Granata for helping me proof read this article to make it sound awesome!
submit your topic suggestion to hello@akccreativestudio.com