In today's beauty industry, where social media plays a huge role in our career, it is crucial for Makeup Artists to understand how to properly capture their work. Often, we blame the camera equipment’s while overlooking the essential role of lighting. This article aims to provide Makeup Artists with some basic knowledge of the different types of lighting & modifiers. By understanding these aspects, artists can have better knowledge to capture their makeup looks, wether using a phone or camera, and deliver high quality photos and videos that truly represent their work.
Before we start, I want to highlight that I will always choose natural window light first for capturing content and doing makeup if it’s available. Why? Because it accurately shows what things really look like in real life. Another great thing is that it doesn't cost a thing, so you don't have to spend money on extra stuff. If this is not an option, here are 3 types of lights you can choose from.
18” Ring Light:
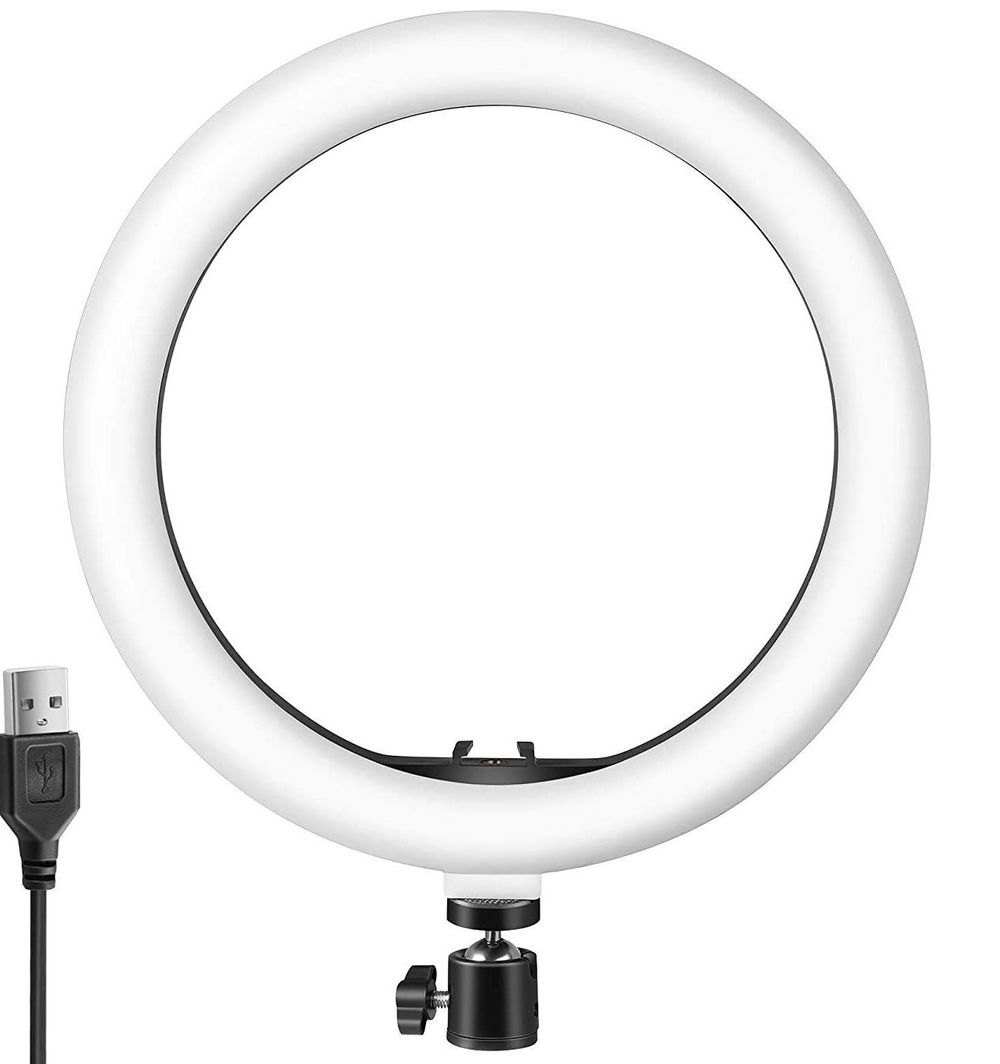
Ring light have become a popular tool used by Makeup Artists, although their intended purpose is often misunderstood. These lights are specifically designed to capture straight on headshot from the neck up, offering high contrast and a distinct circular reflection in the subject’s eyes making the overall feel less natural. One area where ring lights tend to fall short is when it comes to lighting your subject during makeup application. Due to their size & single point illumination, they can create uneven lighting, resulting in one side appearing darker than the other.
Pros:
-Affordable ($50+)
-Small and compact
-Capturing close up contents (Neck up & Macro shots)
Cons:
-Using it to illuminate your subject during application
-Unnatural circular reflection in the subject’s eyes
2. LED Panel

LED panels also gained popularity among Makeup Artists as a lighting option. They are lightweight, affordable, easy to set up, and often offer the convenience of battery power. However, the LED light share a similar weakness to ring lights. Their light source is relatively small, resulting in potential uneven lighting when used for makeup application or content creation. To mitigate this, setting up two panels, one on each side of the subject is often necessary. However this setup can create harsh lighting, emphasizing textures and shines on the subject. Additionally, LED light panels require the subject to be in close proximity to achieve desired lighting effects.
Pros:
-Affordable ($50+)
-Small and compact
-Using it to selfie & capturing close up shots from Neck up
Cons:
-Using it to illuminate your subject during application
-Harsh light that can emphasize textures and shine
3. LED Continuous Light
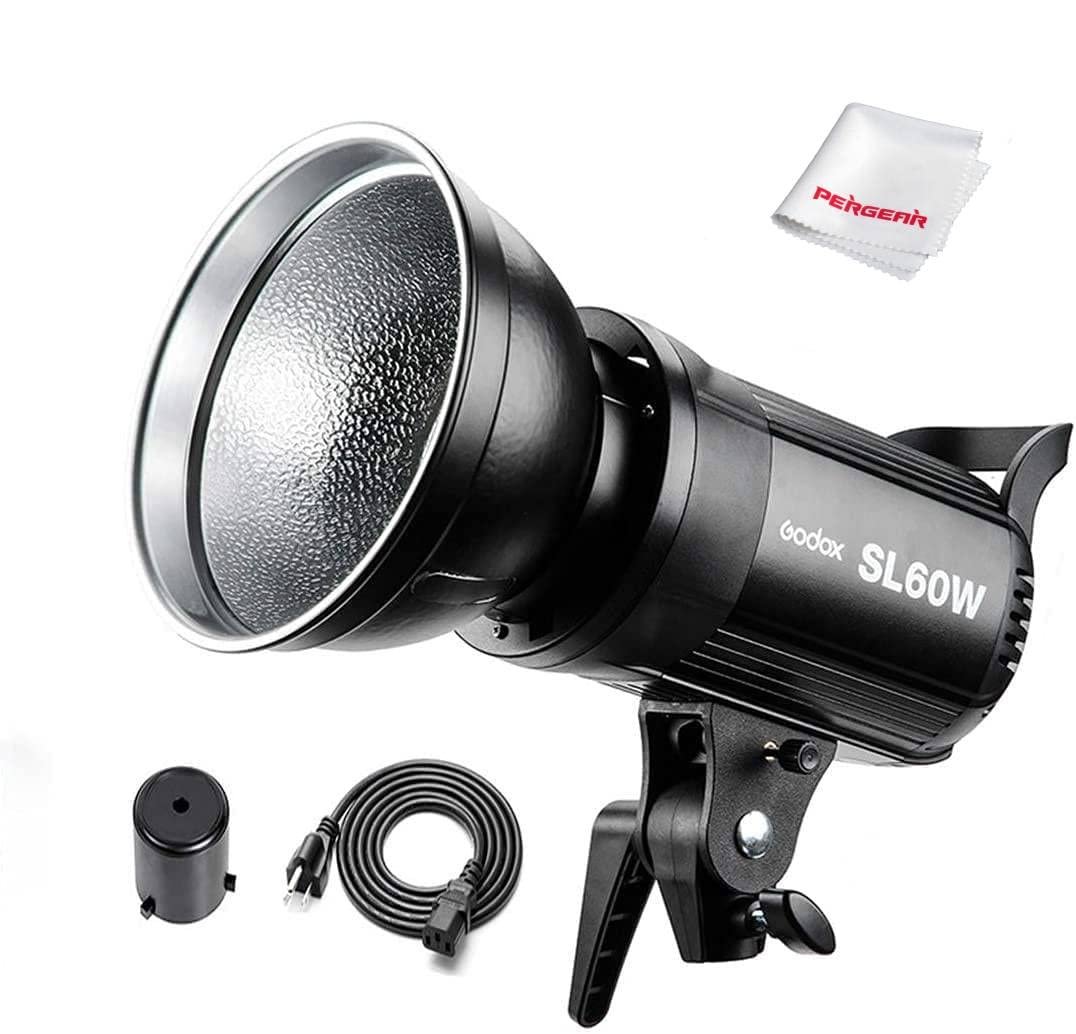
LED continuous lights are a favorite among many due to their versatility, interchangeable modifiers, powerful output, and reasonable pricing. The key advantage of these lights lies in their ability to utilize modifiers, allowing for customization of lighting styles such as harsh light, soft light, and a wide light source. When used without modifiers, these lights typically come with a small silver reflector. By positioning it high on a stand, around 6-10 feet behind you, it can mimic the effect of direct sunlight on the face, evenly illuminating your subject whether slightly to the left or right. This lighting setup can be ideal for makeup application as it highlights every detail and shine, providing a clear view of the finished look. However, it's important to note that without a modifier, the bright light shining directly into the client's eyes can be uncomfortable. Therefore, it is recommended to position the light source higher, shining down on the subject rather than straight on and directly into their eyes. This ensures a more comfortable experience for the client while maintaining the desired lighting effect.
Pros:
-Reasonably priced ($130+)
-Brighter output
-Versatile
-Allows interchangeable modifiers
Cons:
-Bigger, heavier & less compact
-Higher price point
Now, let’s talk about light modifiers. They are essential accessories for LED continuous lights. It's important to note that each light has its own specific type of mount for modifiers to attach to. For example, the Godox SL60W uses the "Bowens Mount" system. When choosing modifiers online, ensure they are compatible with the Bowens Mount or it will not fit.
In this article, we will cover four common types of modifiers: white umbrellas, rectangle softboxes, octoboxes, and honeycomb grids. These modifiers offer various ways to shape and control the light output, allowing you to achieve your desired lighting style.
White Umbrella

The white umbrella is a versatile and affordable light modifier that offers several benefits. It is lightweight, compact, and capable of creating a wide spread of soft light. Whether you intend to use it for creating content at home or during makeup application, the white umbrella is an excellent choice. The key advantage is its ability to produce an even spread of light, resulting in softening the subject without harsh spots. Additionally, it does not emphasize textures or shine, making it ideal for both photo and video content creation. With its wide coverage and ability to create a pleasing and diffused lighting effect, the white umbrella is a valuable tool for Makeup Artists.
Pros:
-Affordable ($15+)
-Light weight & compact
-Wide spread of light
-Soft light
Cons:
-Less shadows & dimensions
2. Rectangle Softbox

The rectangle softbox is a commonly seen light modifier in photo and video studios. It resembles a transitional window and provides more directional lighting compared to a white umbrella. This means that the light from a rectangle softbox doesn't spread as wide, allowing for the creation of dimensions and shadows depending on the placement of the light. A useful tip for identifying the modifier used in a photo is to closely examine the iris of the subject, as it will often exhibit a distinct shape corresponding to the modifier. The rectangle softbox offers a more natural lighting effect, especially when aiming for a window-like ambiance. The size of the softbox also plays a role, with larger boxes producing softer light. Think of sitting in front of a window while doing your makeup as a reference for the desired effect.
Pros:
-Reasonably priced ($60+)
-The most natural light that resembles a window
-Soft & even light
Cons:
-Takes longer to set up
-Heavier, bulkier and requires more space to set up
-More moving parts
3. Octobox

The octobox is a favored light modifier, offering similar characteristics to a rectangle softbox with a distinct difference in the reflection shape in the subject's eyes. It delivers soft and even lighting to the subject, making it ideal for both content creation and makeup application. However, it's important to note that setting up an octobox requires more time and effort compared to other modifiers. It is heavier and bulkier, making it better suited for studio or home office use. If you need a portable light for on-location makeup application, the white umbrella modifier is a suitable alternative. It provides a similar effect but is quicker and lighter to set up, making it more convenient for mobile applications.
Pros:
-Reasonably priced ($100+)
-Soft & even light
Cons:
-Takes longer to set up
-Heavier, bulkier and requires more space to set up
-More moving parts
4. Honeycomb Grid Add-on

The honeycomb grid is an additional accessory that can be used with a rectangle softbox or an octobox. Its primary function is to introduce more shadows and dimensions to the subject. By using a grid, the light is directed in a single direction, preventing it from spreading outwards. While this may result in a slight loss of brightness, it is an effective method to reintroduce shadows and create a more three-dimensional look to your subject. If you find that your images appear flat and lack depth, the honeycomb grid is an excellent tool to bring back those desired shadows and add dimension to your subject.
Final Takeaway
In conclusion, understanding lighting is more important than buying the newest phone or expensive camera. Good lighting is essential for great images, regardless of the camera you use. Even a cheap phone or camera can produce excellent results with proper lighting. Personally, I have expensive camera equipment, but I prefer using my phone for social media content.
Below I linked my amazon list of products that I recommend. Please don’t just buy the stuff and expect automatic results. you have to spend time researching, and educating yourself so in the future you will know how to see and control light and create the vision that you want. If you are like me, that need someone to teach you, DM @akccreatiestudio about a virtual or in-person lesson if you are in NYC.
If you find this article helpful, share, leave a review below and if you wish to buy me a coffee (Venmo @vanktr | Zelle vanktr@gmail.com)